 Ujaval Gandhi
Batch Processing using Processing Framework (QGIS3)
The Processing Framework in QGIS provides an environment within QGIS to run native and third-party algorithms for processing data. It contains a nice batch processing interface that allows one to execute an algorithm on several layers easily. Batch processing is a useful tool that can save manual effort and help you automate repetitive tasks.
Overview of the task
We will take several global vector layers and clip them to the extent of Africa in a single batch command.
Other skills you will learn
Create a Filter to remove unwanted features from a layer without creating a new layer.
Merge multiple layers into a single Geopackage file.
Get the data
Natural Earth has several global vector layers. Download the following layers
For convenience, you may directly download a geopackage containing the above layers from below:
Data Source: [NATURALEARTH]
Procedure
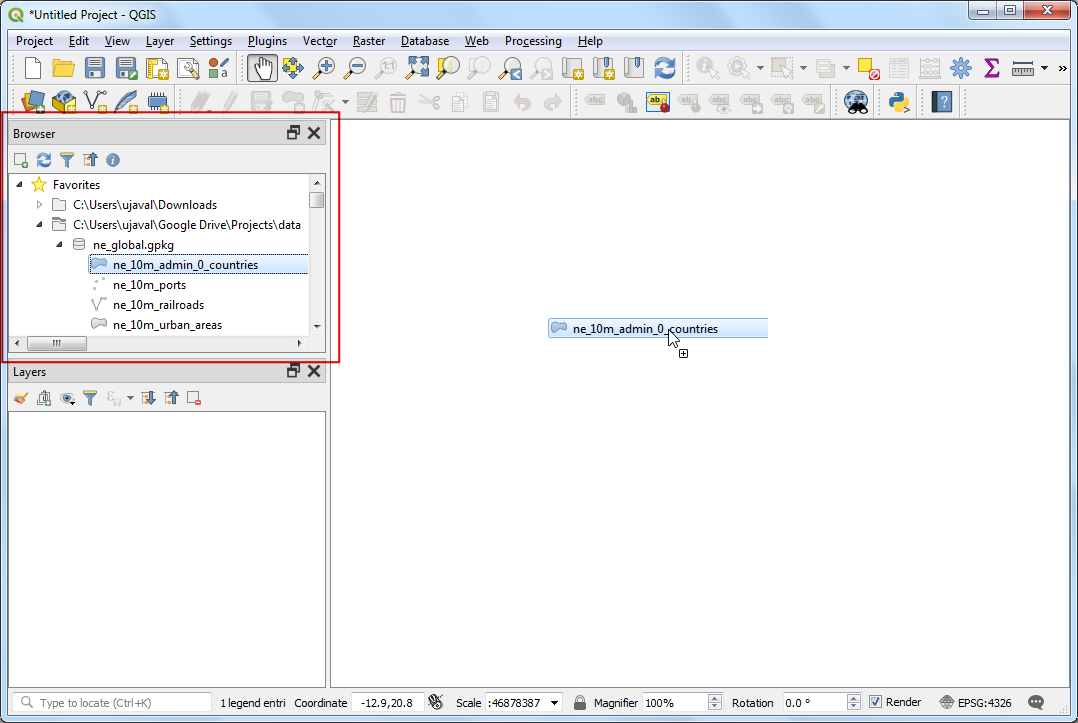
In the QGIS Browser Panel, locate the directory where you saved your downloaded data. Expand the
zipor thegpkgentry and select thene_10m_admin_0_countrieslayer. Drag the layer to the canvas.
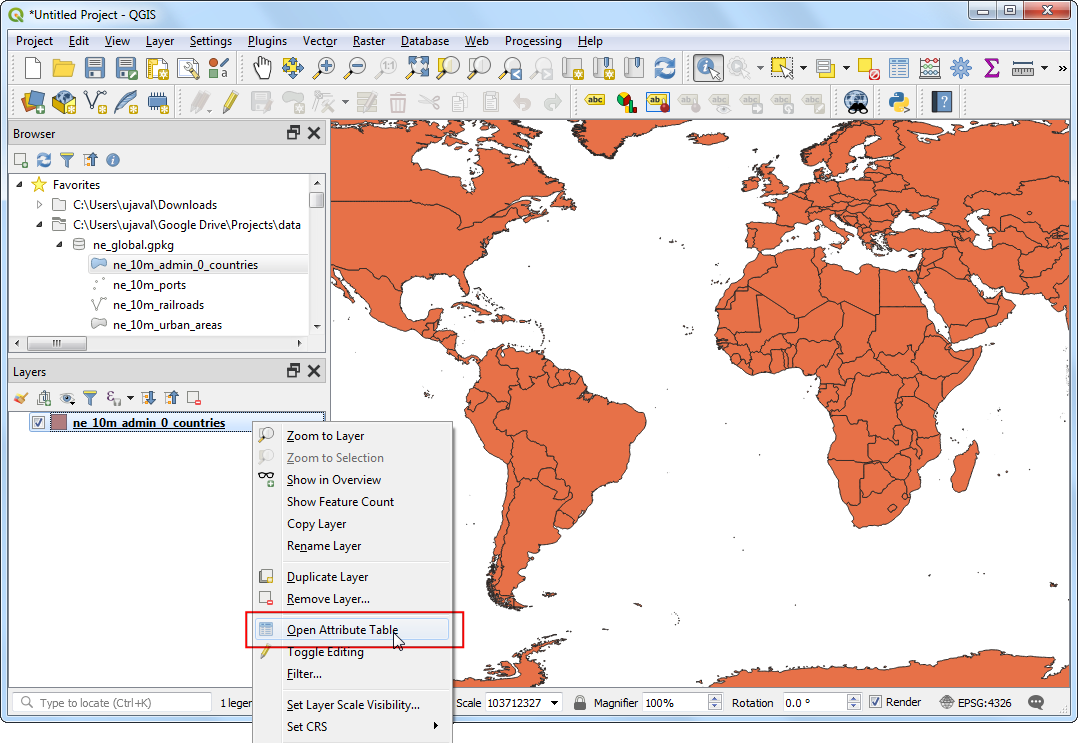
You will see the layer loaded in the Layers panel. As our task is to clip the global layers to the boundary of Africa, we need to first prepare a layer containg features only from that continent. Let’s look at the attribute table to see what column can be used to query features belonging to a particular continent. Right-click the
ne_10m_admin_0_countrieslayer and select Open Attribute Table.
Note
Tip: You can also use the keyboard shortcut F6 to open the attribute table of the selected layer.
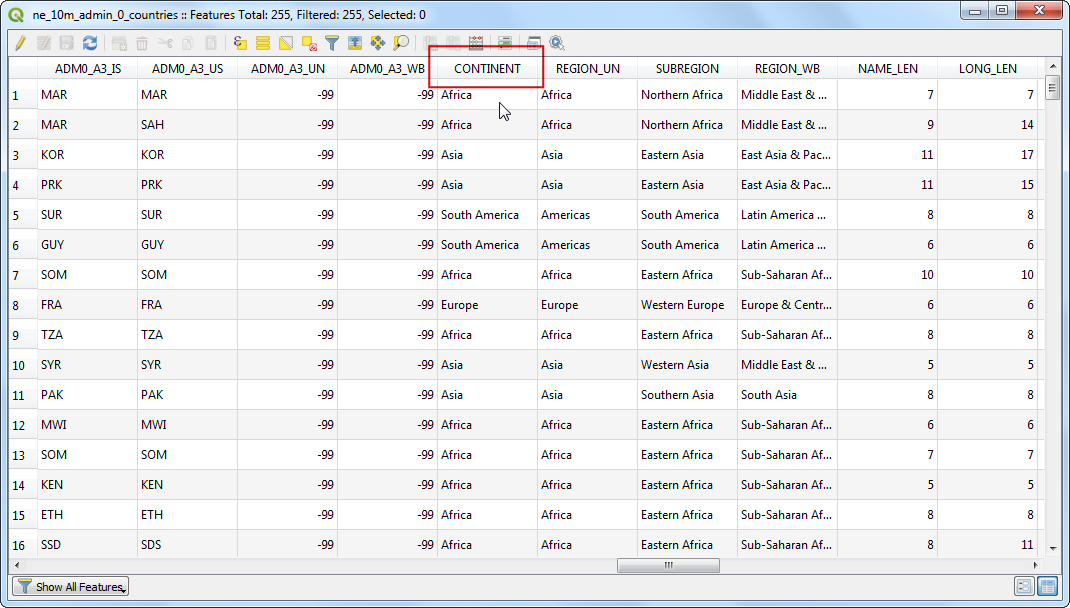
In the Attribute Table window, as you scroll horizontally, you will see that the data contains an attribute called CONTINENT. We can use this attribute to filter features.
Close the attribute table and return to the main QGIS window. Right-click the
ne_10m_admin_0_countrieslayer and select Filter.

In the Query Builder window, select the CONTINENT field and click Sample. This will populate the Values panel with the a subset of values of that attribute from features. This step is useful to get an understanding of what type of values are present in your dataset. We can see that our dataset contains a value called Africa among others.
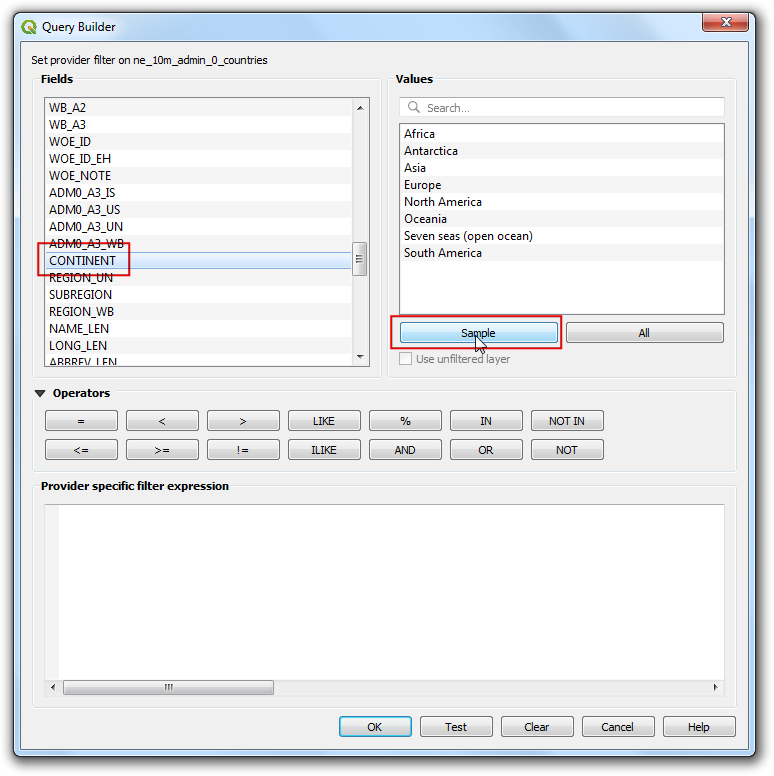
Now enter the expression in the Provider specific filter expression textbox. You can click the CONTINENT label, followed by = button and Africa label. Or you can type the following expression in the textbox. Click OK after entering the expression.
"CONTINENT" = 'Africa'
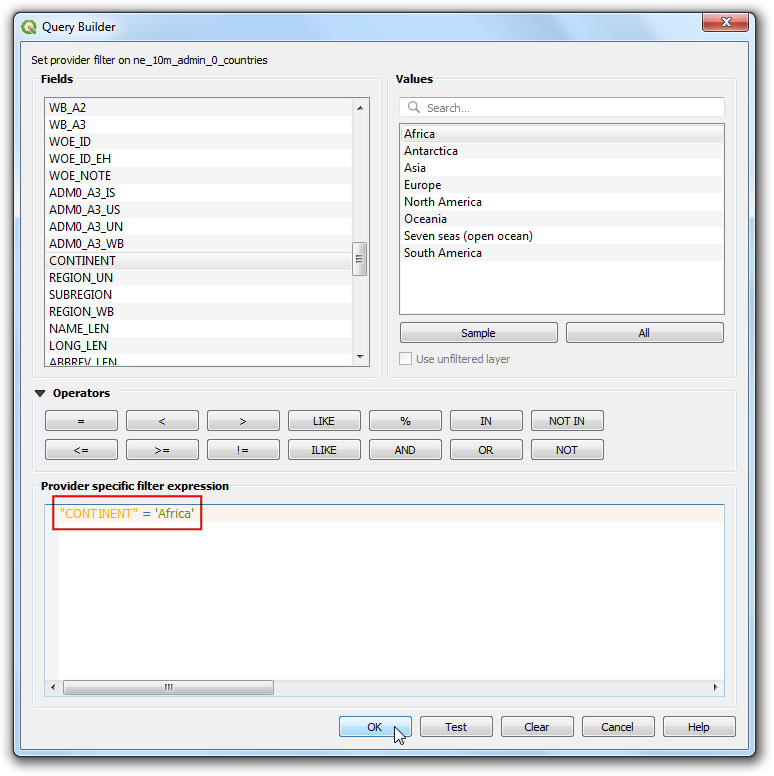
You will see that the map canvas now contains only the countries from Africa. Note the filter icon next to the layer name indicating that that layer a filter applied to it. If you wanted to see and use all the features from the layer, you can click the filter icon and clear the expression. For now, we will keep the filter so we can clip other layers to Africa.

We are now ready to run the batch process to clip the layers. Locate the natural earth global layers
ne_10m_railroads,ne_10m_portsandne_10m_urban_areasin the QGIS Browser panel. Hold the Ctrl key and click each layer to select them. Once selected, drag them to the canvas.
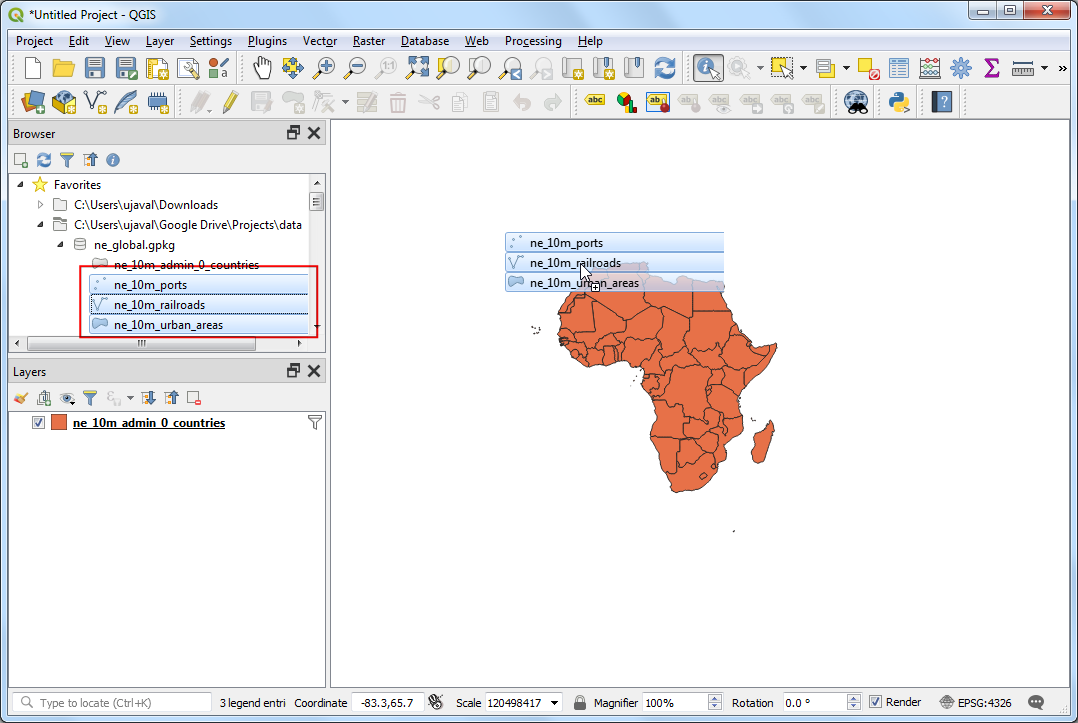
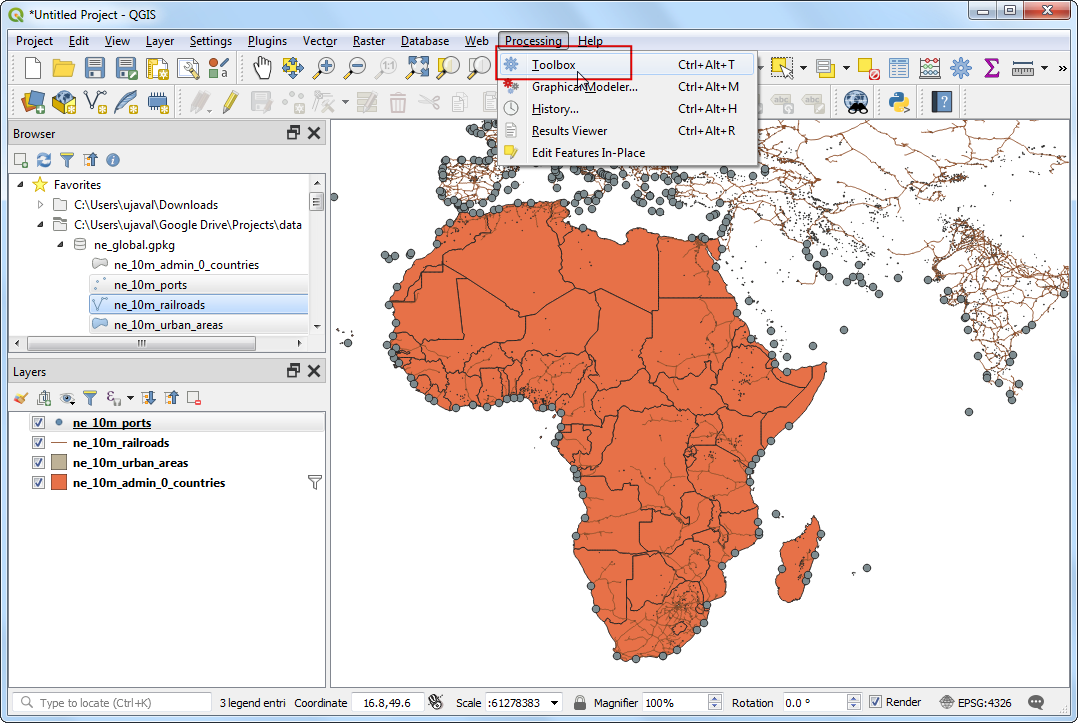
Once the layers are loaded, you will notice that they are global layers and have features spanning all the countries. Now, it’s time to start our batch clip process to clip these layers to Africa. Open .
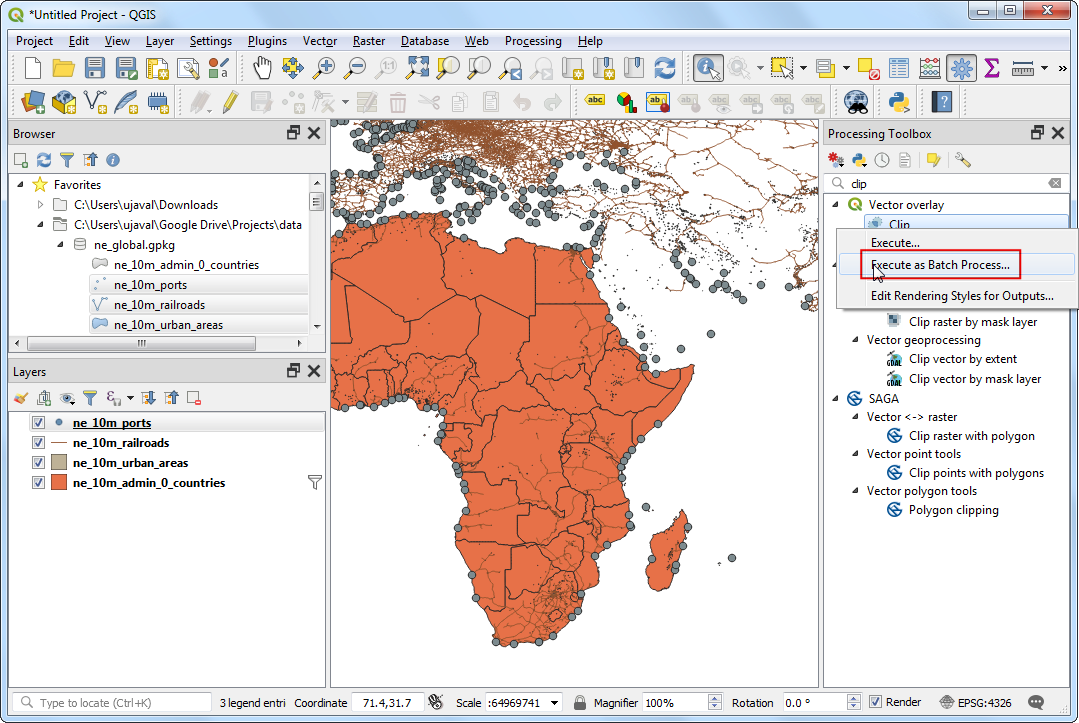
Browse all available algorithms and find the Clip tool from . You may also use the Search box to easily find the algorithm as well.
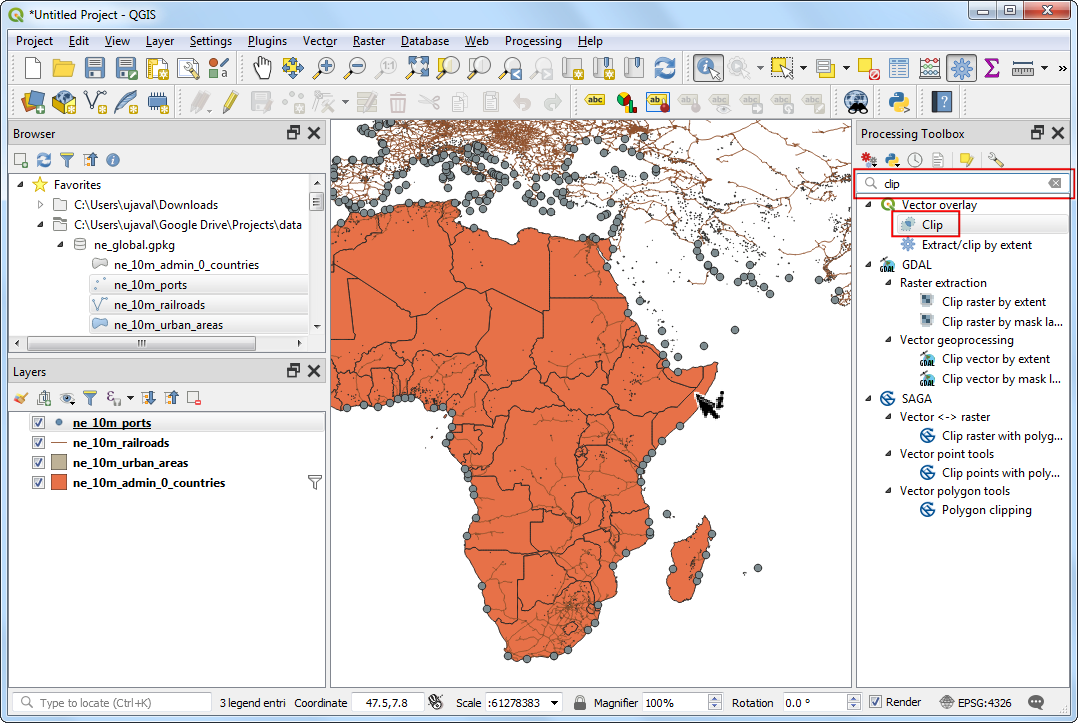
Right-click the Clip algorithm and select Execute as Batch Process.
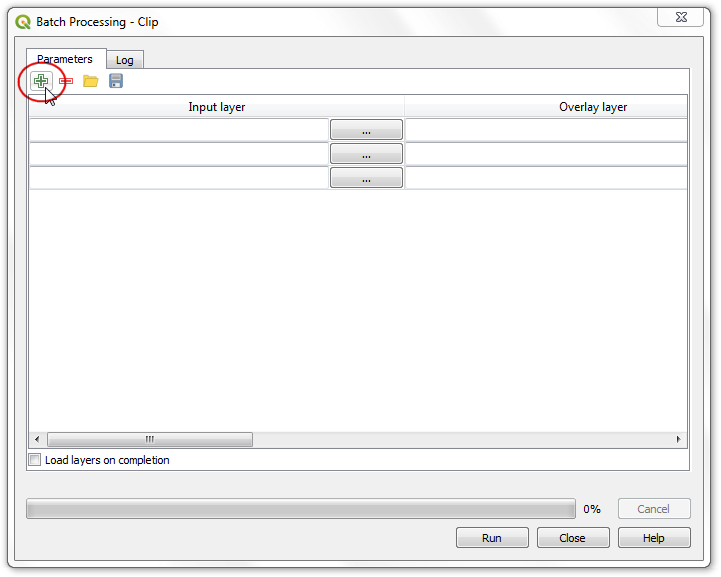
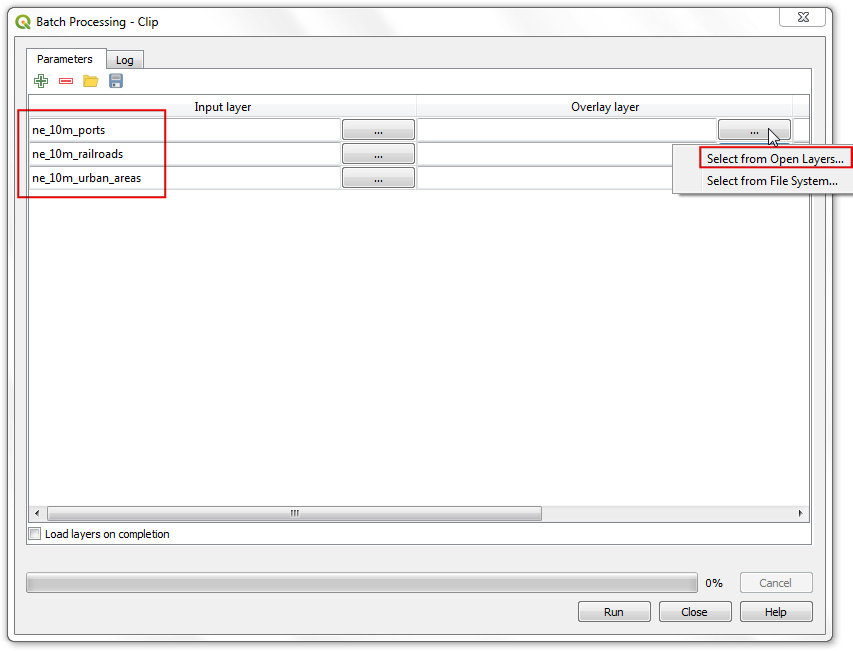
In the Batch Processing dialog, the first tab is Parameters where we define our inputs. Each row in the table represents 1 processing task. Click Add row button to add a new row. As our task involves 3 layers, add 3 rows.
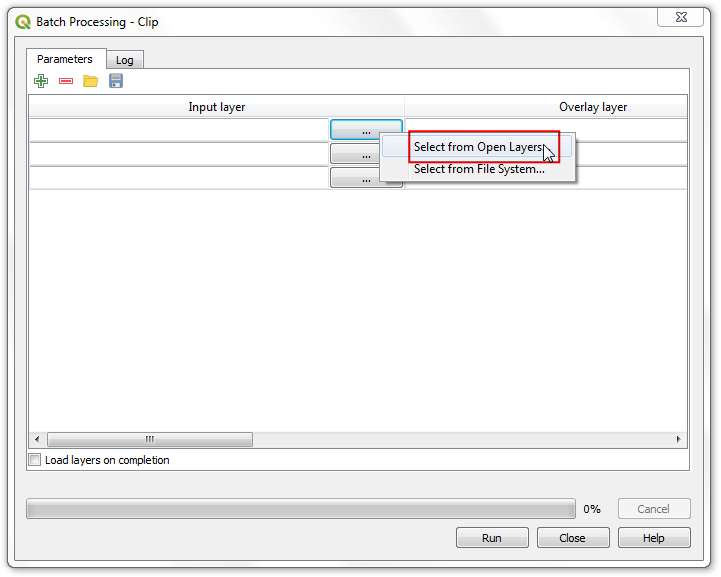
Click the … next to the first row in the Input layers column. Select Select from Open Layers.
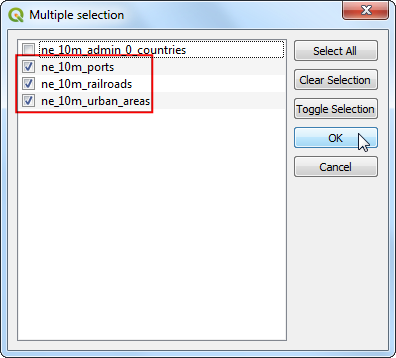
In the Multiple selection dialog, check the 3 layers that we want to clip and click OK.
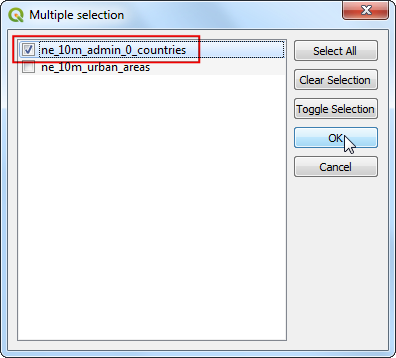
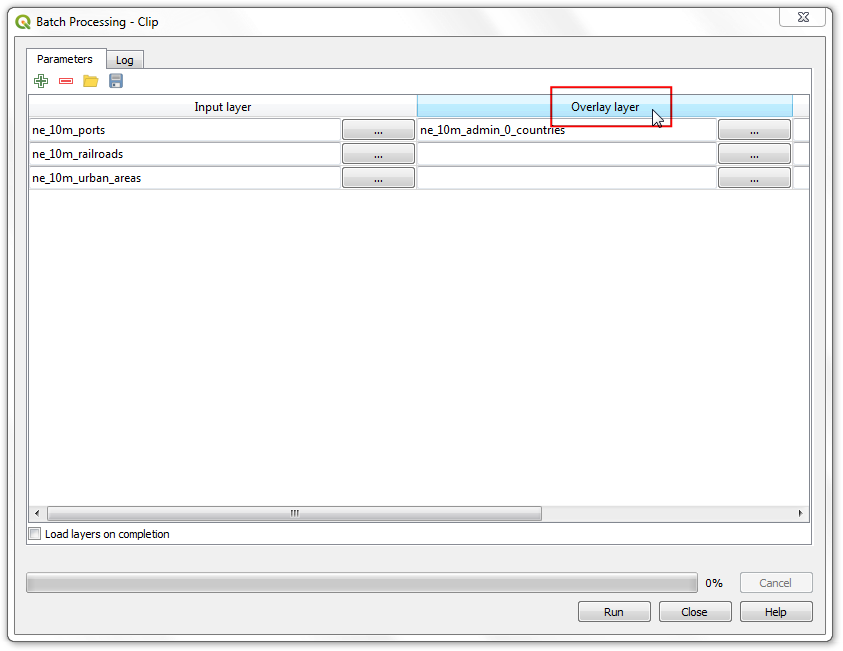
You will notice that the Input layer columns will be auto-populated with all layers you had selected. Next, we need to select the layer containing the boundary to clip our input layers. Click the … button for the first row under Overlay layer column and select Select form Open Layers.
In the Multiple selection dialog, check
ne_10m_admin_0_countriesand click OK.
Since the clip layer is the same for all our inputs, a handy shortcut is to double-click the column header Overlay layer and the same layer will be auto-filled for all the rows.
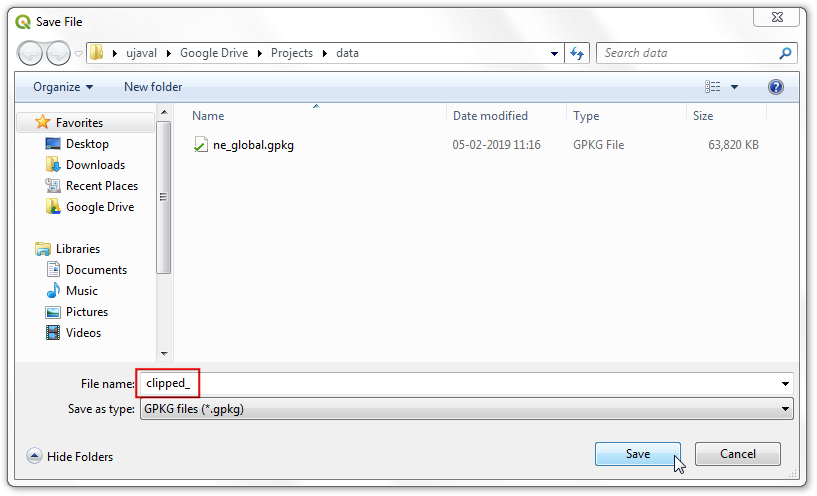
Next, we need to define our outputs. Click the … buton next to the first row in the Clipped column.
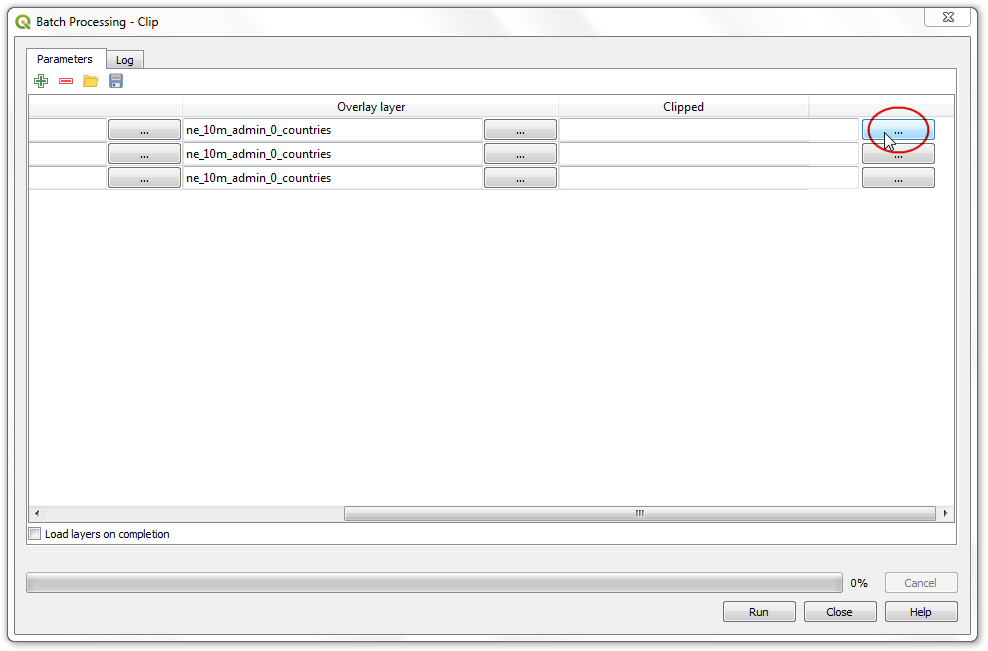
Browse the the directory where you want your output layers. Type the filename as
clipped_and click Save.
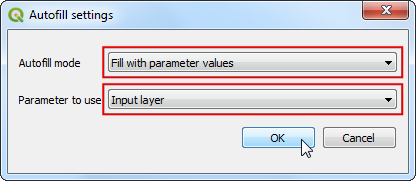
You will see a new Autofill settings dialog pop up. Select
Fill with parameter valuesas the Autofill mode. SelectInput layeras the Parameter to use. This setting will add the input file name to the output along with the specifiedclipped_filename. This is important to ensure all the output files have unique names and they do not overwrite each other.
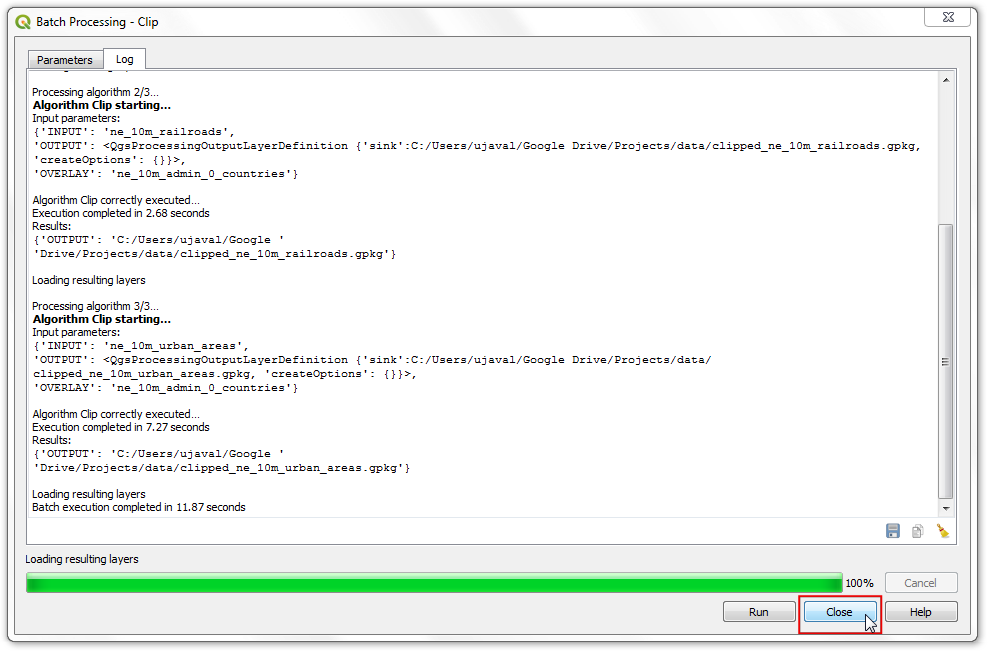
Now we are ready to start the batch procesing. Make sure to check Load layers on completion and click Run.

The clip algorithm will run for each of the inputs and create output files as we have specified. Once the batch process finishes, click Close to return to QGIS.
Note
Tip: QGIS can now run Processing tasks in the background without blocking the user interface. So if your batch process is taking long, you can close the dialog and continue to work on other tasks in QGIS while the process keeps running in the background.
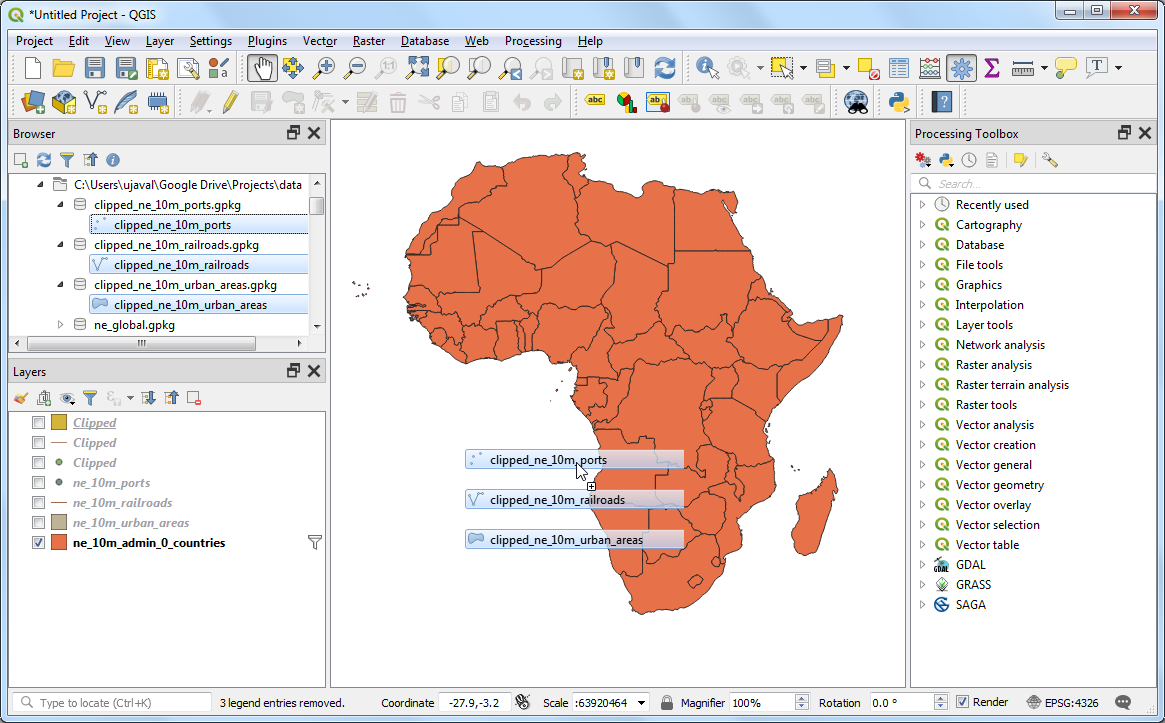
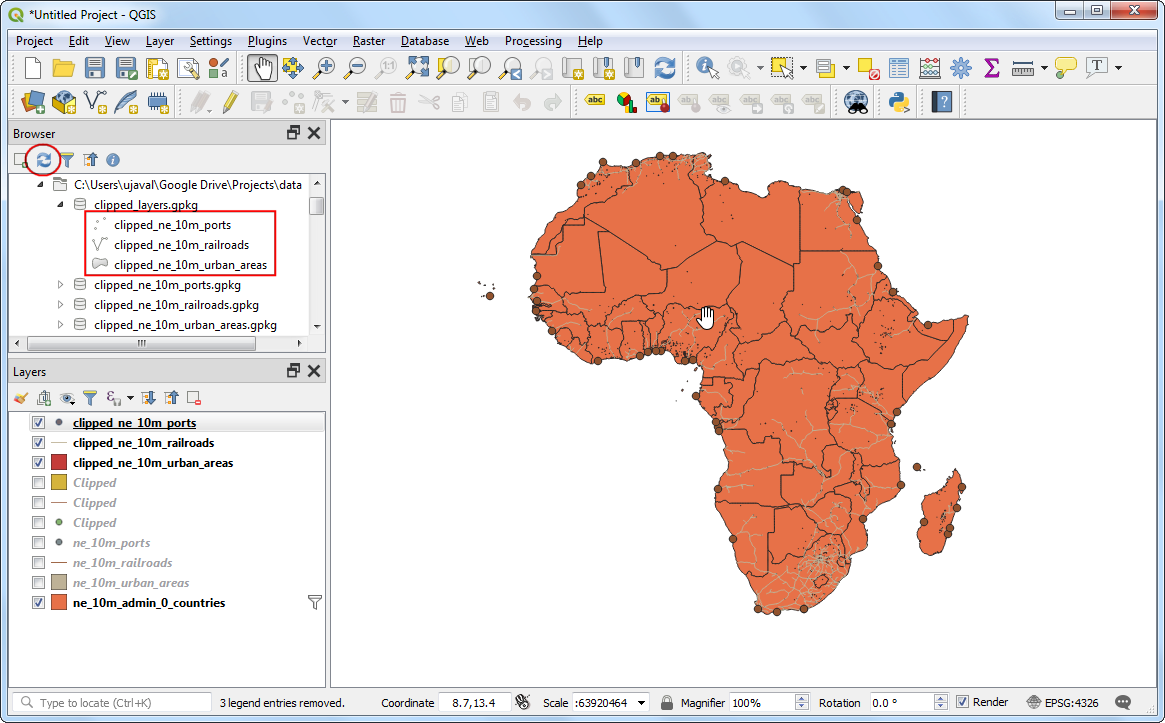
Back in the main QGIS window, you will see the layers added to QGIS canvas. As you will notice, all the global layers are properly clipped to the continent boundary that we had specified.

We have accomplished the task of clipping multiple layers in a batch. But QGIS3 has another handy feature that will help you save and deliver the result in a more efficient way. If you wanted to deliver the clipped layers to someone, you would zip the individual files outside of QGIS. A better option is to package the output layers in a single Geopackage. In the QGIS Browser, locate the clipped output layers. You may have to click the Refresh button to see the newly added files.

Hold Ctrl key and select the layers. Drag them to the canvas to load them in QGIS.
In Processing Toolbox, locate the tool.
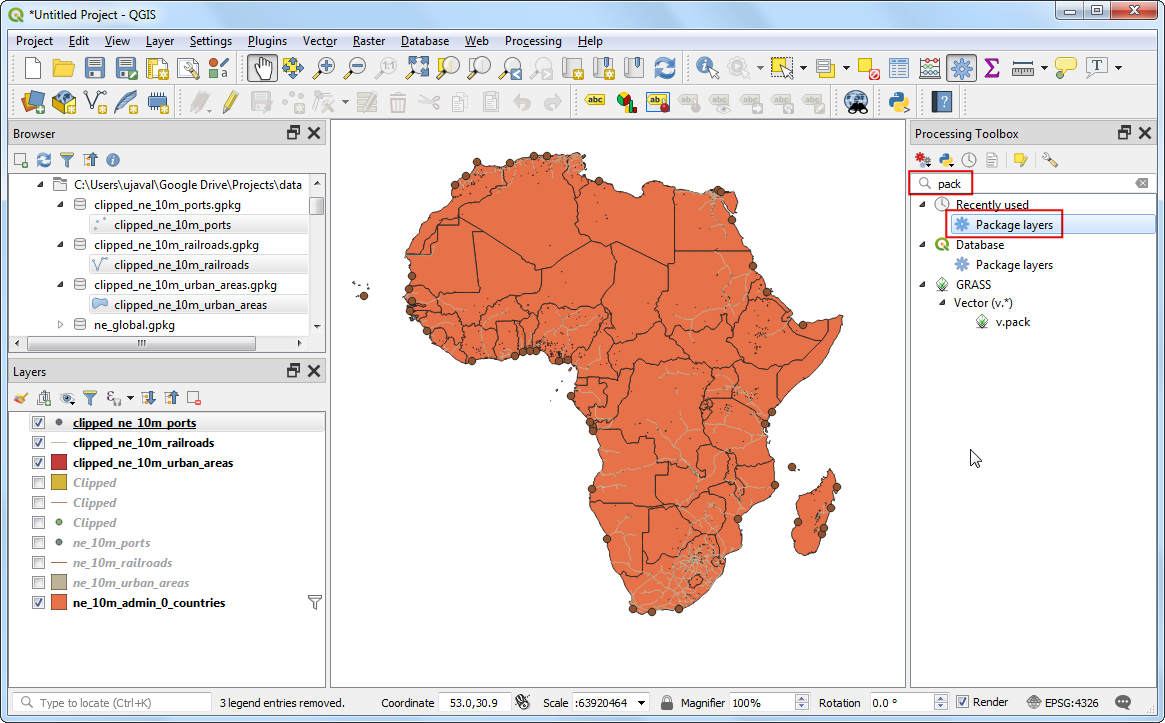
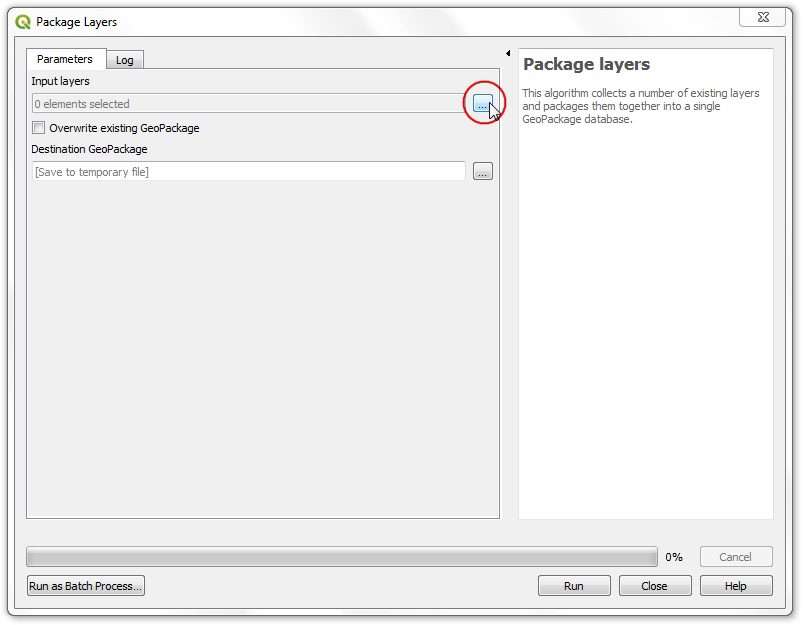
In the Package layers dialog, click the … button next to Input layers.
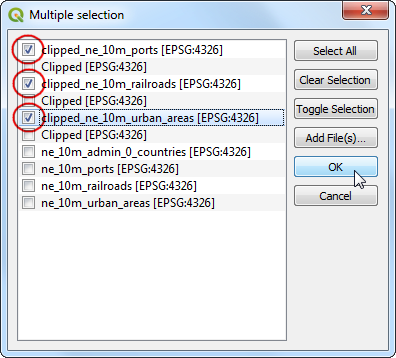
In the Multiple selection dialog, check the
clipped_ne_10m_ports,clipped_ne_10m_railroadsandclipped_ne_10m_urban_areaslayers. Click OK.
Once the input layers are selected, click the … next to Destination Geopackage and choose Save To File.
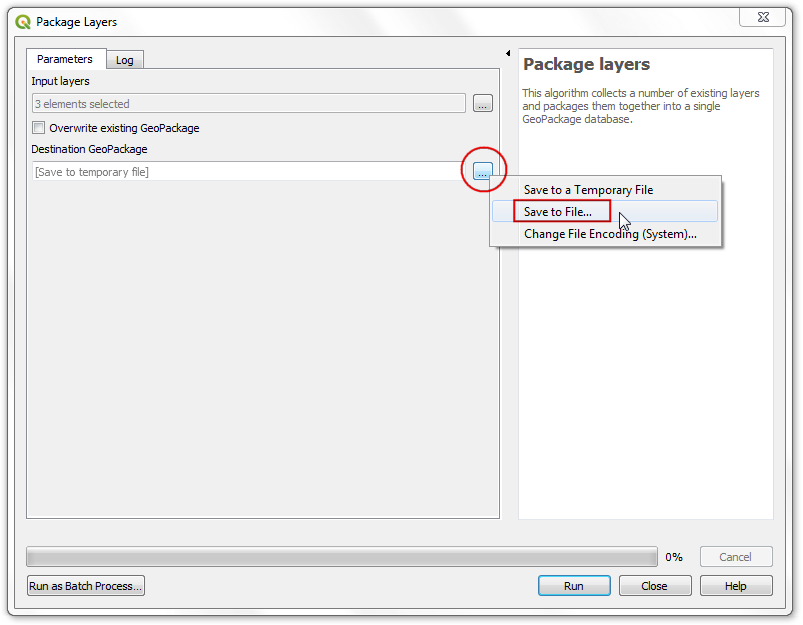
Enter the output file name as
clipped_layers.
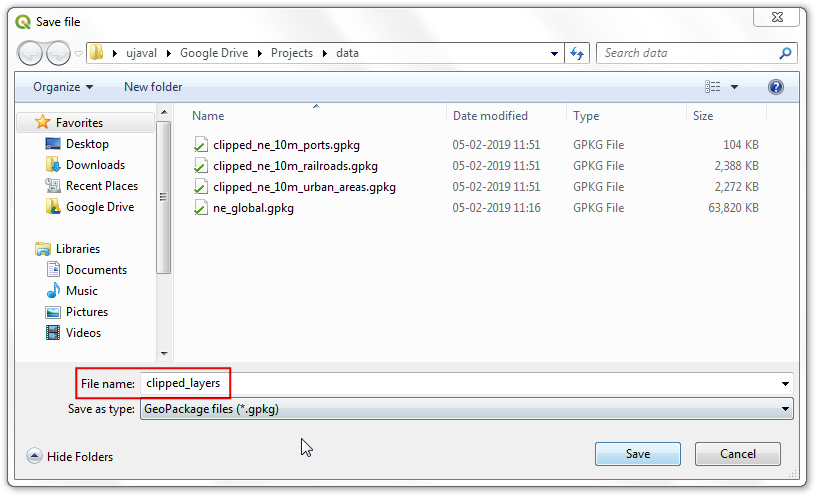
Click Run to start the packaging process.

Once the process finishes, you will see a new geopackage file in your QGIS Browser containing all the clipped output layers. This is a single file on your computer that contains all the output layers.
If you want to give feedback or share your experience with this tutorial, please comment below. (requires GitHub account)