 Ujaval Gandhi
اجرا و برنامه ریزی پردازش وظیفه ای در QGIS
You can automate a lot of tasks in QGIS using Python scripting (PyQGIS) and the Processing Framework. Most of the time, you would run these scripts manually while QGIS is open. While that is helpful, many times you need a way to run this jobs via the command-line and without needing to open QGIS. Fortunately, you can write standalone python scripts that use QGIS libraries and can be run via the command-line. In this tutorial, we will learn how to write and schedule a job that uses the QGIS Processing framework.
نمای کلی تمرین
بیایید بگوییم ما در حال اجرای عملیات بر روی برخی از تجزیه و تحلیل ها با استفاده ازلایه های برداری با فرمت shapefile یک منطقه هستیم. این لایه های برداری به صورت روزانه به روز می شوند و ما همیشه به جدیدترین فایل نیاز داریم. اما قبل از اینکه بتوانیم از این فایلها استفاده کنیم ، باید داده ها را ویرایش کنیم. ما می توانیم یک وظیفه QGIS تعریف کنیم که این فرآیند را به طور خودکار انجام دهد و روزانه آن را اجرا کند. بنابراین شما می توانید جدیدترین فایلهای ویرایش شده را برای کار عملیات داشته باشید. ما یک اسکریپت مستقل پایتون خواهیم نوشت که یک لایه برداری را بارگیری می کند و عملیات ویرایش کردن توپولوژیک را به صورت روزانه انجام می دهد.
مهارت های دیگری که خواهید آموخت
بارگیری و باز کردن فایل ها با استفاده از پایتون.
اجرا وپردازش برنامه با PyQGIS.
رفع خطاهای توپولوژیکی در یک لایه برداری.
اخذ داده
` پایگاه دادهژئوفابریک Geofabrik <http://www.geofabrik.de/>`_ داده های برداری OpenStreetMap فراهم می کند.
ما در اینجا از لایه برداری فیجی <http://download.geofabrik.de/australia-oceania.html>`_ برای این تمرین استفاده خواهیم نمود. فایل های زیپ شده fiji-latest.shp.zip بارگیری نماییدو فایل زیپ شده را باز نمایید و آن در یک مسیر پوشه مناسب قرار دهید.
منابع داده [GEOFABRIK]
مراحل کاری
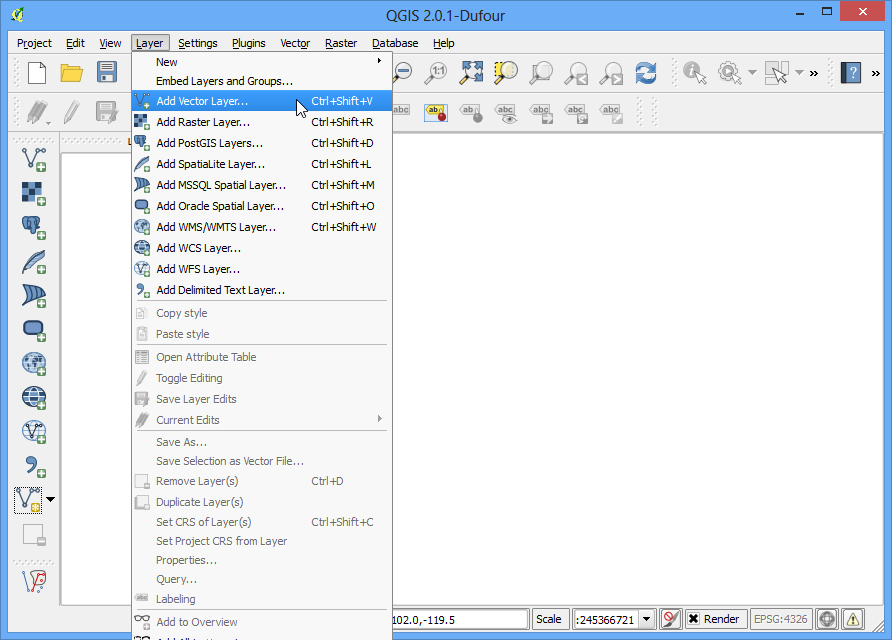
ابتدا فرایند ویرایش لایه برداری را به صورت دستی اجرا خواهیم کرد تا دستوراتی را که در اسکریپت پایتون استفاده خواهیم کرد، یادکنیم. QGIS را راه اندازی کرده و به منوی بروید.
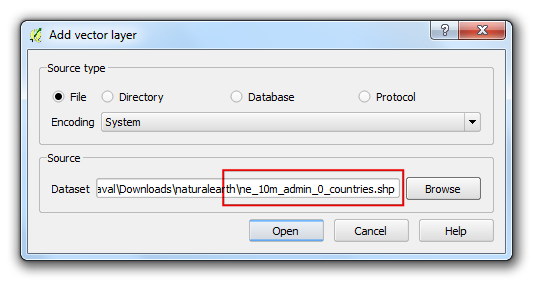
به پوشه ای که حاوی فایلها بروید و فایل "roads.shp" را انتخاب کرده و بر دکمه :guilabel:`Open`کلیک کنید.
ابتدا سیستم مختصات پروژکشن CRS باید لایه برداری راه ها را تغییر می دهیم. این به ما امکان می دهد هنگام انجام تجزیه و تحلیل به جای درجه ، از * متر * به عنوان واحد استفاده کنیم. به منوی رفته، آن را باز کنید.
ابزار Reproject layer را جستجو کنید. برای راه اندازی کدر آن، روی آن دوبار کلیک کنید.
در کادر محاوره ای Reproject layer لایه "جاده ها" را به عنوان لایه ورودی Input layer`انتخاب کنید. ما از سیستم مختصات CRS ``EPSG:3460 Fiji 1986 / Fiji Map Grid` به عنوان سیستم مختصات مقصد Target CRS استفاده خواهیم کرد. کلیک کنید با کلیک بر Run، برنامه را اجرا کنید.
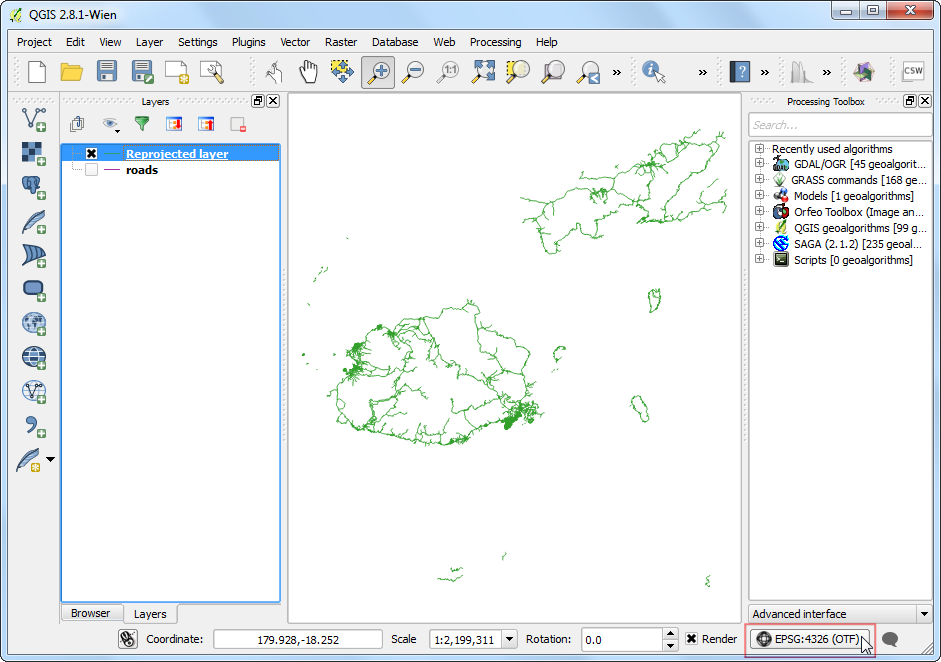
پس از اتمام روند ، لایه پروژکشن شده در QGIS مشاهده می کنید. به منوی برویید.
در کادر محاوره ای History and Log ، پوشه:guilabel:Algorithm را باز کنید و آخرین ورودی را انتخاب کنید. دستور کامل پردازش را در صفحه پایین مشاهده خواهید کرد. برای استفاده در اسکریپت به این دستورات توجه نمایید.
دوباره به پنجره اصلی QGIS بروید ، روی دکمه:guilabel:`CRS`در گوشه پایین سمت راست کلیک کنید.
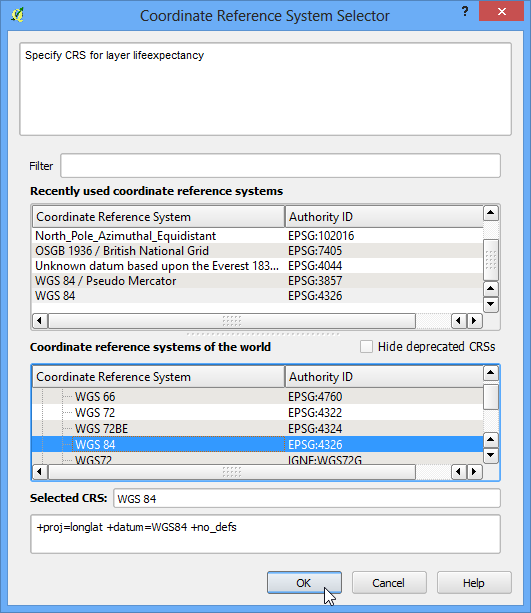
در کادر محاوره ای Project Properties | CRS گزینه تبدیل هندسی سیستم مختصات Enable on-the-fly CRS transformation را علامت بزنید: تا تبدیل CRS در پرواز را فعال شود و پروژکشن
EPSG:3460 Fiji 1986 / Fiji Map Gridرا به عنوان CRS انتخاب کنید. این اطمینان حاصل می گردد که لایه های اصلی و ایجاد شده ما به درستی رویه هم قرار بگیرند.
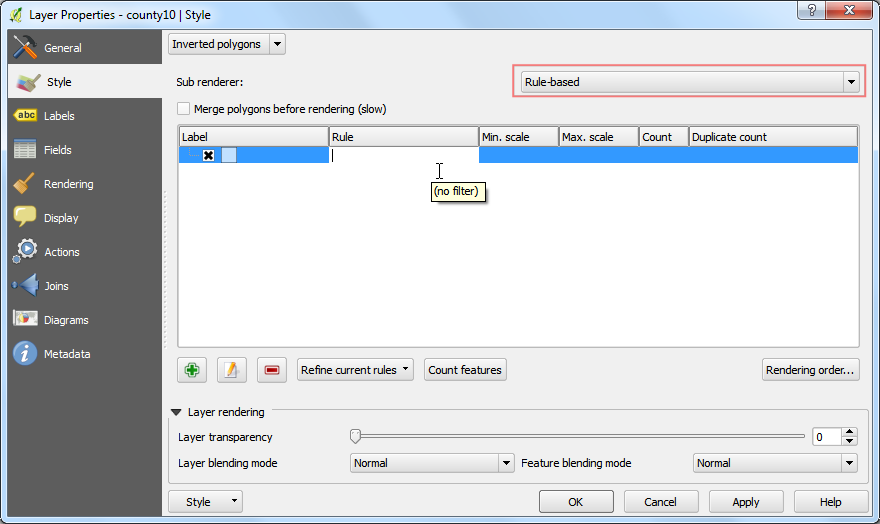
اکنون عملیات ویرایشرا اجرا خواهیم کرد. GRASS دارای یک مجموعه بسیار قدرتمند از ابزار ویرایش توپولوژیک است. این موارد در QGIS از طریق برنامه "v.clean" در دسترس هستند. این برنامه را Processing Toolbox جستجو کنید و روی آن دوبار کلیک کنید تا کادر آن، راه اندازی شود.
می توانید اطلاعات بیشتر درباره ابزارها و گزینه های مختلف را در راهنما Help مطالعه کنید. برای این آموزش ، ما از ابزار snap برای حذف رئوس تکراری که در فاصله 1 متری یکدیگر قرار دارند استفاده خواهیم کرد.
Reprojected layerرا به عنوان لایه ورودی Layer to clean`انتخاب کنید. گزینه ``snap` را به عنوان ابزار پاکسازی Cleaning tool`انتخاب کنید. عدد ``1.00``را به عنوان حد آستانه :guilabel:`Threshold وارد کنید. قسمتهای دیگر را خالی بگذارید و بر دکمه Run کلیک کنید.
پس از پایان پردازش ، 2 لایه جدید به QGIS اضافه می شوید. لایه برداری Cleaned vector layer` لایه ای است که خطاهای توپولوژیکی آناصلاح شده است. همچنین یک لایه خطاها
Errors layerخواهید داشت که ویژگی های ترمیم شده را نمایش می دهد. برای دیدن رئوس برداشته شده می توانید از لایه خطاها به عنوان راهنما استفاده کرده و بزرگنمایی کنید.
Go to dialog and note the full processing command for later use.
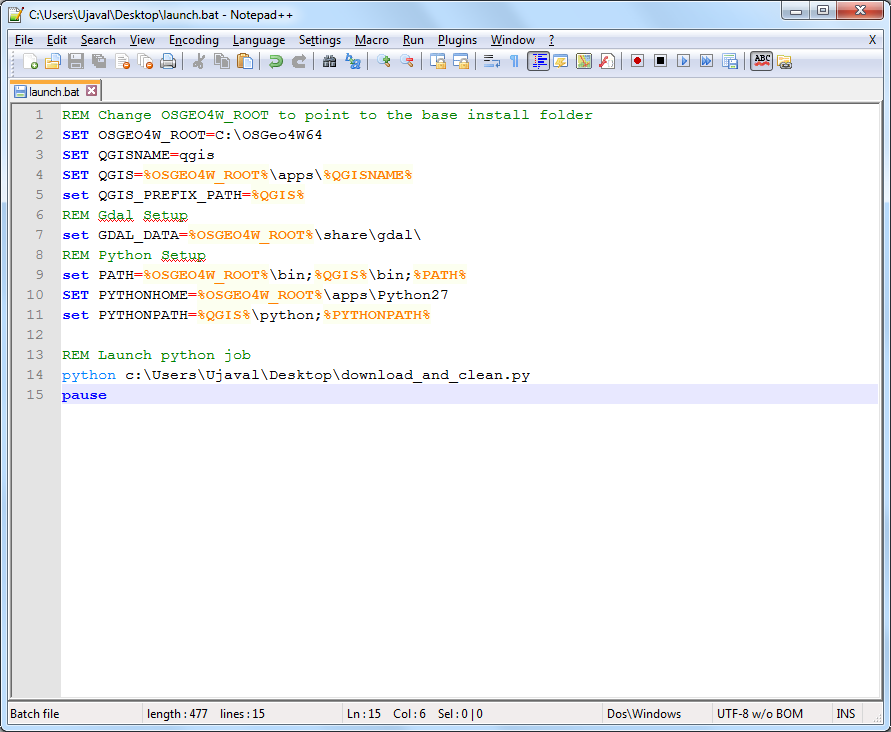
We are ready to start coding now. See the A Text Editor or a Python IDE section in the ساخت پلاگین پایتون tutorial for instructions to setup your text editor or IDE. For running standalone python scripts that use QGIS, we must set various configuration options. A good way to run standalone scripts is to launch them via a
.batfile. This file will first set the correct configuration options and then call the python script. Create a new file namedlaunch.batand enter the following text. Change the values according to your QGIS configuration. Don't forget to replace the username with your own username in the path to the python script. The paths in this file will be the same on your system if you installed QGIS via theOSGeo4W Installer. Save the file on your Desktop.
توجه
Linux and Mac users will need to create a shell script to set the paths and environment variables.
REM Change OSGEO4W_ROOT to point to the base install folder
SET OSGEO4W_ROOT=C:\OSGeo4W64
SET QGISNAME=qgis
SET QGIS=%OSGEO4W_ROOT%\apps\%QGISNAME%
set QGIS_PREFIX_PATH=%QGIS%
REM Gdal Setup
set GDAL_DATA=%OSGEO4W_ROOT%\share\gdal\
REM Python Setup
set PATH=%OSGEO4W_ROOT%\bin;%QGIS%\bin;%PATH%
SET PYTHONHOME=%OSGEO4W_ROOT%\apps\Python27
set PYTHONPATH=%QGIS%\python;%PYTHONPATH%

REM Launch python job
python c:\Users\Ujaval\Desktop\download_and_clean.py
pause
Create a new python file and enter the following code. Name the file as
download_and_clean.pyand save it on your Desktop.
from qgis.core import *
print 'Hello QGIS!'
Switch to your Desktop and locate the
launch.baticon. Double-click it to launch a new command window and run the script. If you seeHello QGIS!printed in the command window, your configuration and setup worked fine. If you see errors or do not see the text, check yourlaunch.batfile and make sure all the paths match the locations on your system.

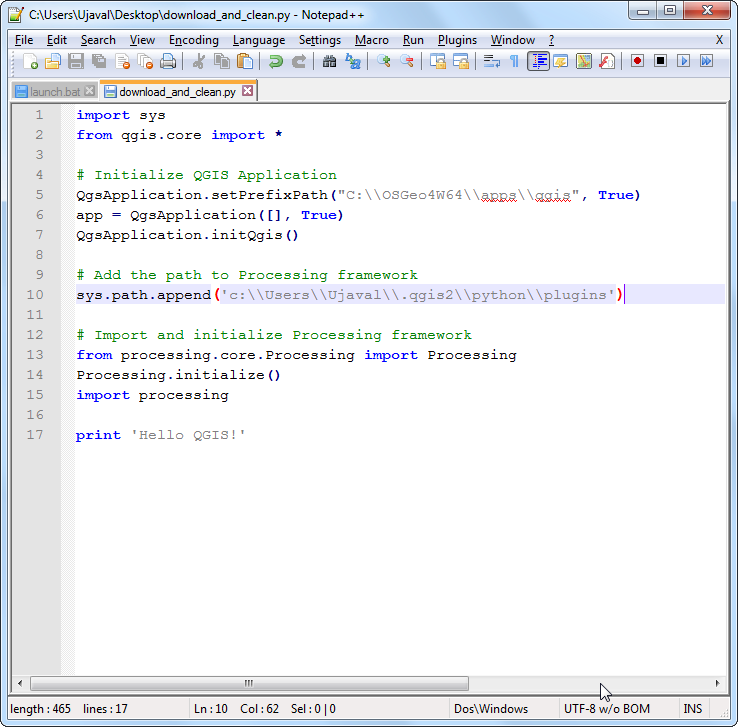
Back in your text editor, modify the
download_and_clean.pyscript to add the following code. This is the bootstrap code to initialize QGIS. These are unnecessary if you are running the script within QGIS. But since we are running it outside QGIS, we need to add these at the beginning. Make sure you replace the username with your username. After making these changes, save the file and runlaunch.batagain. If you seeHello QGIS!printed, you are all set to do add the processing logic to the script.
import sys
from qgis.core import *

# Initialize QGIS Application
QgsApplication.setPrefixPath("C:\\OSGeo4W64\\apps\\qgis", True)
app = QgsApplication([], True)
QgsApplication.initQgis()

# Add the path to Processing framework
sys.path.append('c:\\Users\\Ujaval\\.qgis2\\python\\plugins')

# Import and initialize Processing framework
from processing.core.Processing import Processing
Processing.initialize()
import processing

print 'Hello QGIS!'
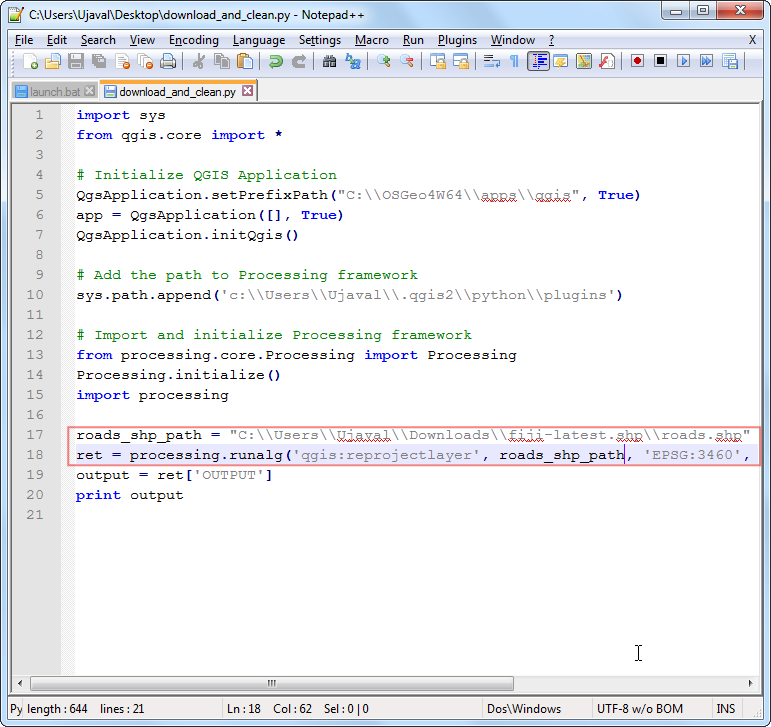
Recall the first processing command that we had saved from the log. This was the command to re-project a layer. Paste the command to your script and add the surrounding code as follows. Note that processing commands return the path to the output layers as a dictionary. We are storing this as the
retvalue and printing the path to the reprojected layer.
roads_shp_path = "C:\\Users\\Ujaval\\Downloads\\fiji-latest.shp\\roads.shp"
ret = processing.runalg('qgis:reprojectlayer', roads_shp_path, 'EPSG:3460',
None)
output = ret['OUTPUT']
print output
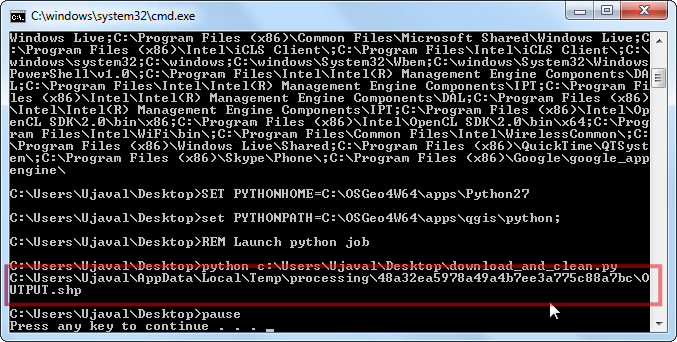
Run the script via
launch.batand you will see the path to the newly created reprojected layer.
Now add the code for cleaning the topology. Since this is our final output, we will add the output file paths as the last 2 arguments for the
grass.v.cleanalgorithm. If you left these blank, the output will be created in a temporary directory.
processing.runalg("grass:v.clean",
                  output,
                  1,
                  1,
                  None,
                  -1,
                  0.0001,
                  'C:\\Users\\Ujaval\\Desktop\\clean.shp',
                  'C:\Users\\Ujaval\\Desktop\\errors.shp')
Run the script and you will see 2 new shapefiles created on your Desktop. This completes the processing part of the script. Let's add the code to download the data from the original website and unzip it automatically. We will also store the path to the unzipped file in a variable that we can pass to the processing algorithm later. We will need to import some additional modules for doing this. (See the end of the tutorial for the full script with all the changes)
import os
import urllib
import zipfile
import tempfile

temp_dir = tempfile.mkdtemp()
download_url = 'http://download.geofabrik.de/australia-oceania/fiji-latest.shp.zip'
print 'Downloading file'
zip, headers = urllib.urlretrieve(download_url)
with zipfile.ZipFile(zip) as zf:
    files = zf.namelist()
    for filename in files:
        if 'roads' in filename:
            file_path = os.path.join(temp_dir, filename)
            f = open(file_path, 'wb')
            f.write(zf.read(filename))
            f.close()
            if filename == 'roads.shp':
                roads_shp_path = file_path
Run the completed script. Everytime you run the script, a fresh copy of the data will be downloaded and processed.
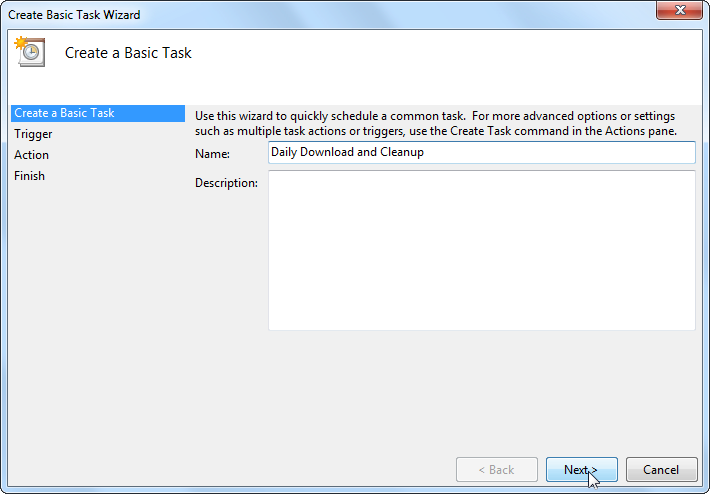
To automate running on this script on a daily basis, we can use the
Task
Scheduler
in Windows. Launch the Task Scheduler and click Create Basic Task.
توجه
Linux and Mac users can use cron jobs to schedule tasks.
Name the task as
Daily Download and Cleanupand click Next.
Select
Dailyas the Trigger and click Next
Select a time as per your liking and click Next.
Choose
Start a programas the Action and click Next.
Click Browse and locate the
launch.batscript. Click Next.
Click Finish at the last screen to schedule the task. Now the script will automatically launch at the specified time to give you a fresh copy of cleaned data everyday.
Below is the full download_and_clean.py script for your reference.
import sys
from qgis.core import *

import os
import urllib
import zipfile
import tempfile

# Initialize QGIS Application
QgsApplication.setPrefixPath("C:\\OSGeo4W64\\apps\\qgis", True)
app = QgsApplication([], True)
QgsApplication.initQgis()

# Add the path to Processing framework
sys.path.append('c:\\Users\\Ujaval\\.qgis2\\python\\plugins')

# Import and initialize Processing framework
from processing.core.Processing import Processing
Processing.initialize()
import processing

# Download and unzip the latest shapefile
temp_dir = tempfile.mkdtemp()
download_url = 'http://download.geofabrik.de/australia-oceania/fiji-latest.shp.zip'
print 'Downloading file'
zip, headers = urllib.urlretrieve(download_url)
with zipfile.ZipFile(zip) as zf:
    files = zf.namelist()
    for filename in files:
        if 'roads' in filename:
            file_path = os.path.join(temp_dir, filename)
            f = open(file_path, 'wb')
            f.write(zf.read(filename))
            f.close()
            if filename == 'roads.shp':
                roads_shp_path = file_path

print 'Downloaded file to %s' % roads_shp_path

# Reproject the Roads layer
print 'Reprojecting the roads layer'

ret = processing.runalg('qgis:reprojectlayer', roads_shp_path, 'EPSG:3460', None)
output = ret['OUTPUT']

# Clean the Roads layer
print 'Cleaning the roads layer'

processing.runalg("grass:v.clean",
                  output,
                  1,
                  1,
                  None,
                  -1,
                  0.0001,
                  'C:\\Users\\Ujaval\\Desktop\\clean.shp',
                  'C:\Users\\Ujaval\\Desktop\\errors.shp')
print 'Success'