 Ujaval Gandhi
Working with Projections (QGIS3)
Map projections - or Coordinate Reference System (CRS) - often cause a lot of frustration when working with GIS data. But a proper understanding of the concepts and access to the right tools will make it much easier to deal with projections. In this tutorial, we will explore how projections work in QGIS and learn about tools available for vector and rasters data layers.
Overview of the task
The task is to re-project selected features of a layer and overlay data layers of different projections together in QGIS.
Get the data
Natural Earth has Admin 0 - Countries dataset. Download the countries
UK’s Ordnance Survey provides open data for download. Download the MiniScale raster product for Great Britain and extract it to a folder on your computer.
For convenience, you may directly download a copy of the dataset from the link below:
minisc_gb.zip (Contains only the files required for this tutorial)
Data Sources: [NATURALEARTH] [OSOPENDATA]
Procedure
Open QGIS. Go to .
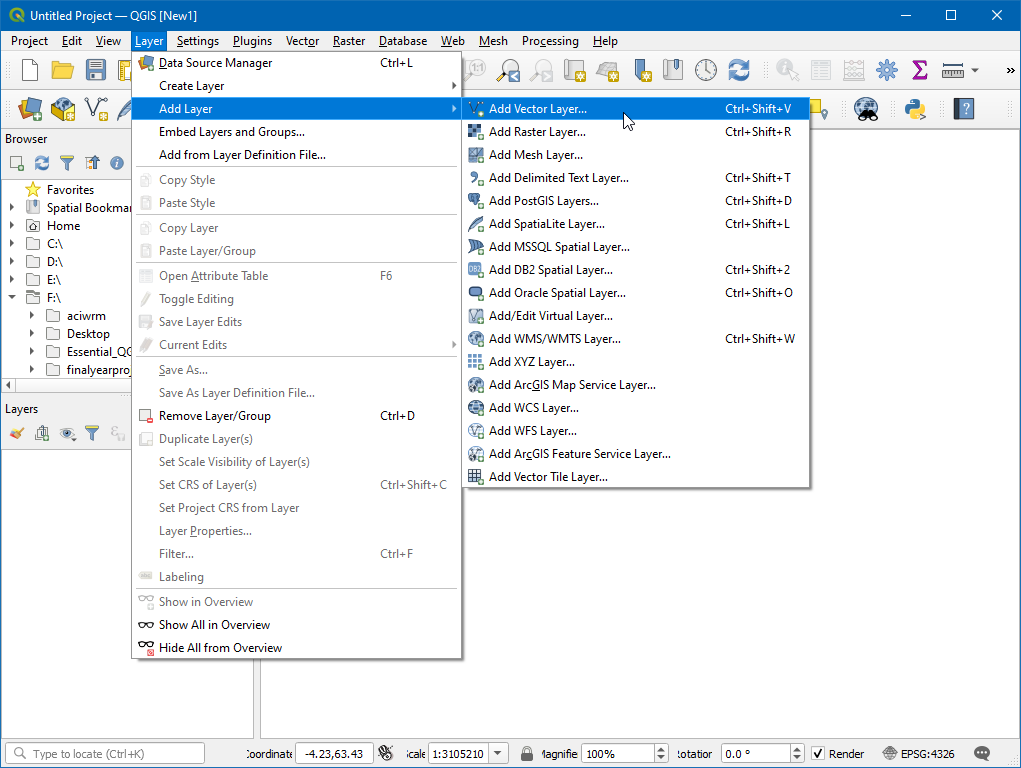
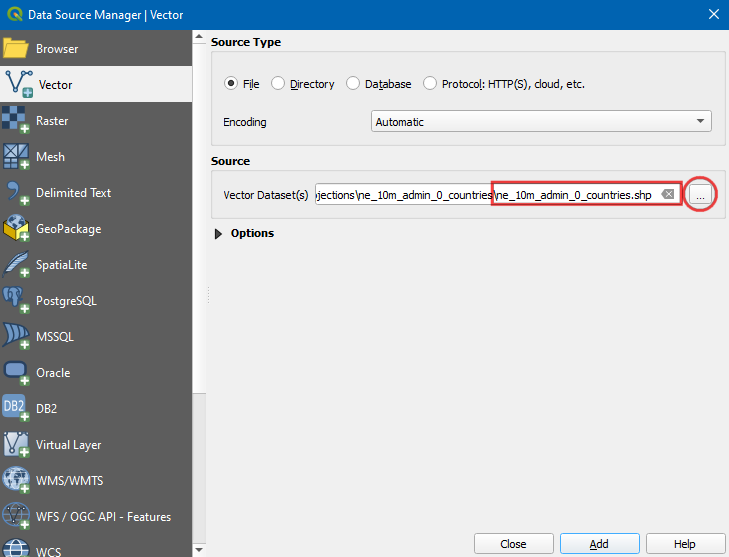
Click on … next to Source, Browse to the downloaded
ne_10m_admin_0_countries.shpfile and click Add.
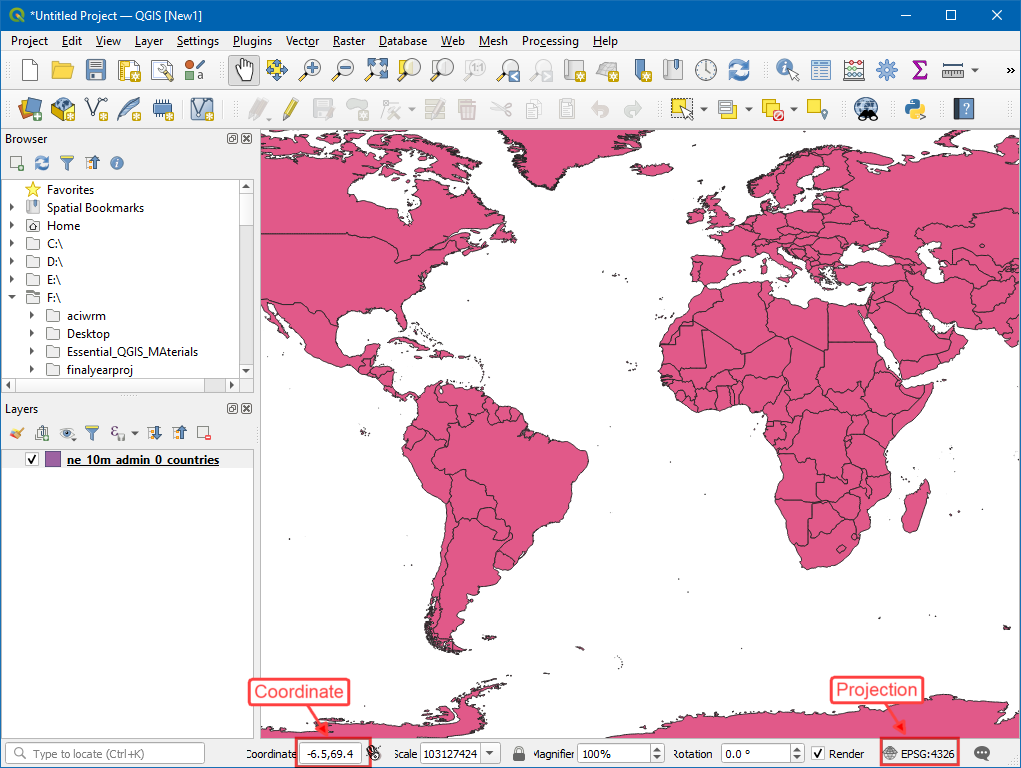
At the bottom of QGIS window, you will notice the label Coordinate. As you move your cursor over the map, it will show you the X and Y coordinates at that location. At the bottom-right corner you will see EPSG:4326. This is the code for the current CRS (Projection) for the project - also known as the Project CRS.
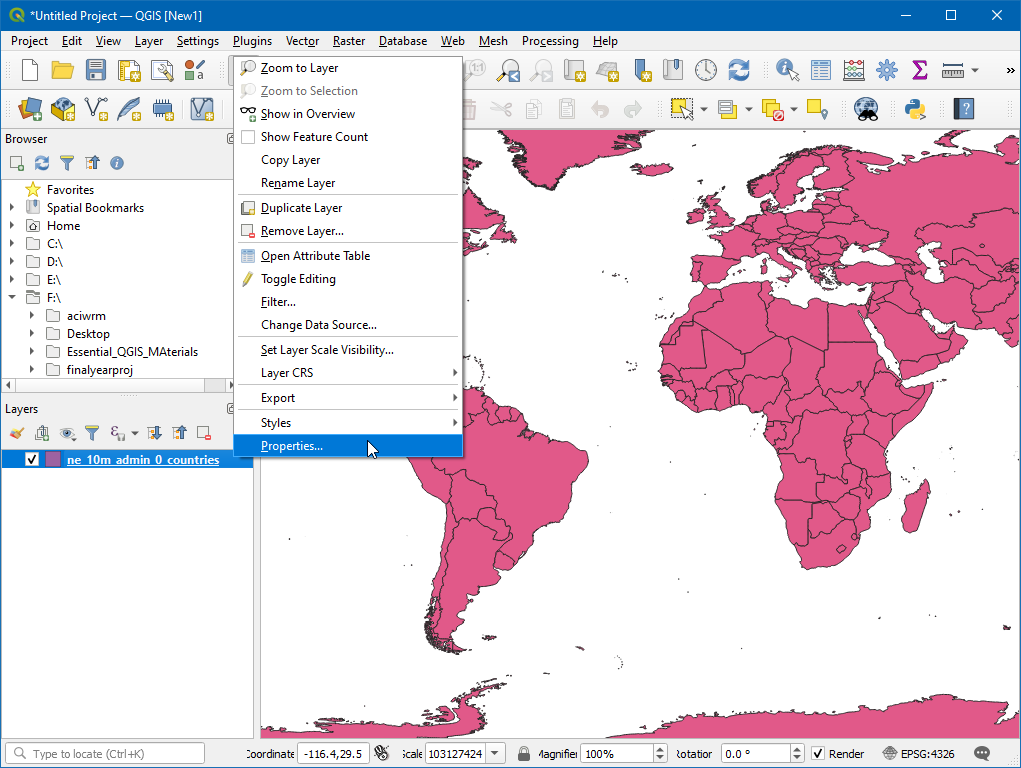
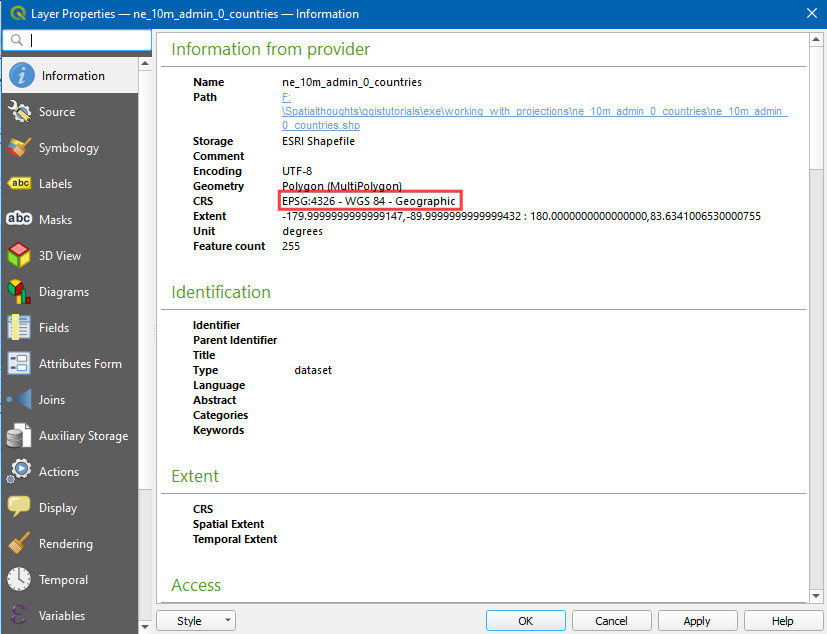
To determine a layer’s projection, we can look into the metadata. Right click on
ne_10m_admin_0_countrieslayer and select Properties.
Switch to the Information tab in the Layer Properties dialog. Expand the Information from provider section. At the bottom, you will see the name of the projection under CRS.
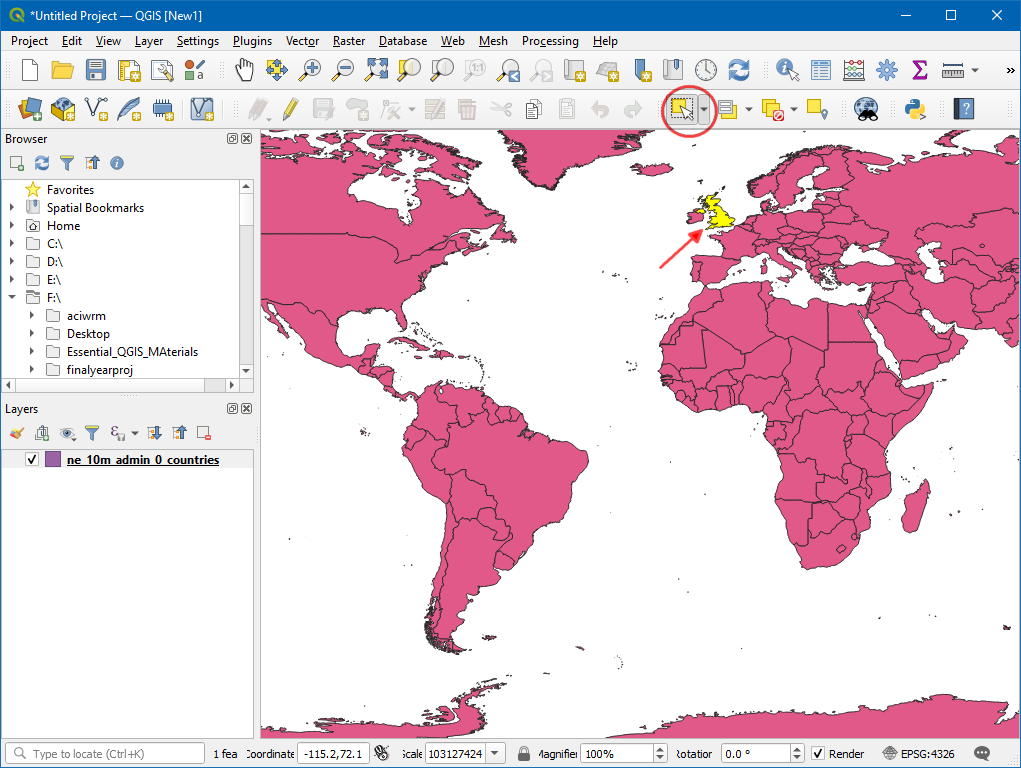
Now let’s see how we can change the layer’s projection. This operation is called Re-Projection. Rather than re-projecting the entire layer, we can also select a subset of features and re-project them to a new layer. Use the Select features by area or single click tool and click on United Kingdom feature to select it.
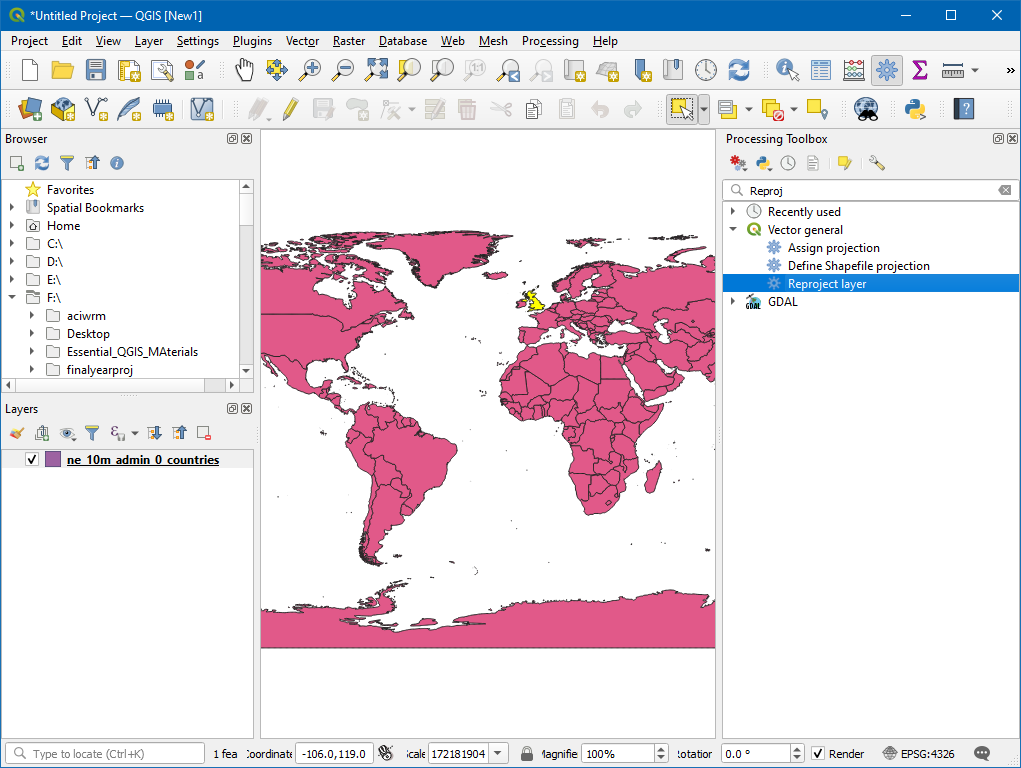
Search for and locate the algorithm in Processing toolbox.
Select
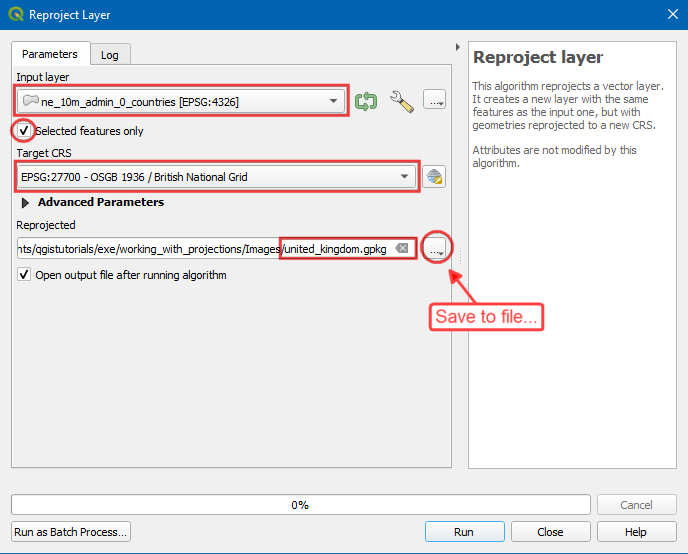
ne_10m_admin_0_countriesas the Input layer, check Selected features only then click on the globe icon next to Target CRS, search and selectEPSG:27700 - OSGB 1936 / British National Grid. In Reprojected, choose the...and click Save to a file. Now choose the directory and enter the name asunited_kingdom.gkpgand click Run.
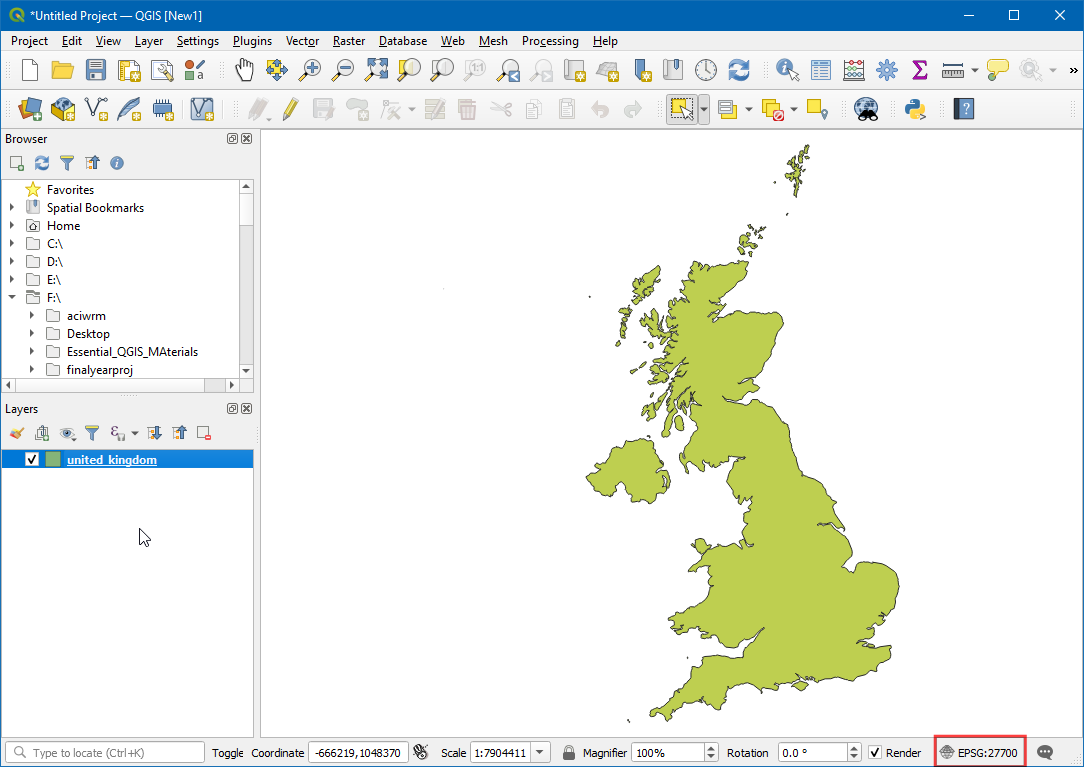
A new layer
united_kingdomwill appear on the Layer Panel. As you see, both the layers still line up exactly with each other - even though they are in different CRSs. This is because QGIS supports On-The-Fly (OTF) CRS transformation. Which means that whenever a layer’s CRS doesn’t match the Project CRS, it will automatically be transformed to the Project CRS so it can be displayed correctly. Now let’s set the Project CRS to match the newly createdunited_kingdomLayer’s CRS. Remove thene_10m_admin_0_countrieslayer and, right click on theunited_kingdomlayer .
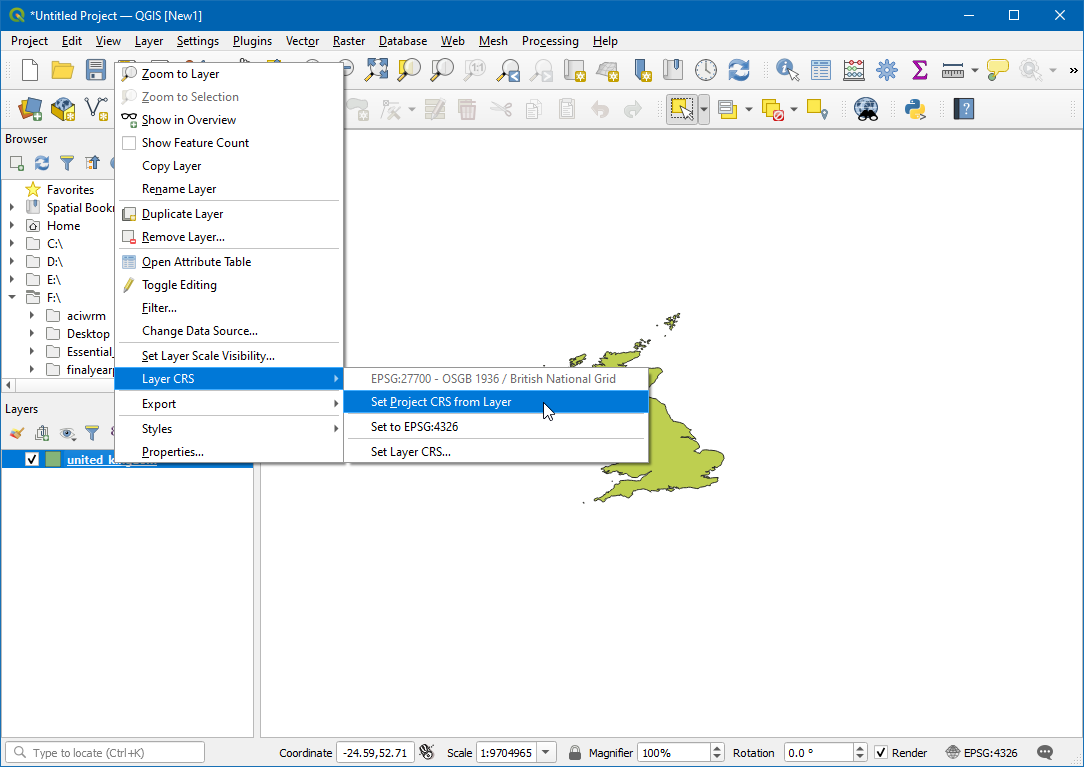
You will see the Project CRS is updated to
EPSG:27700.
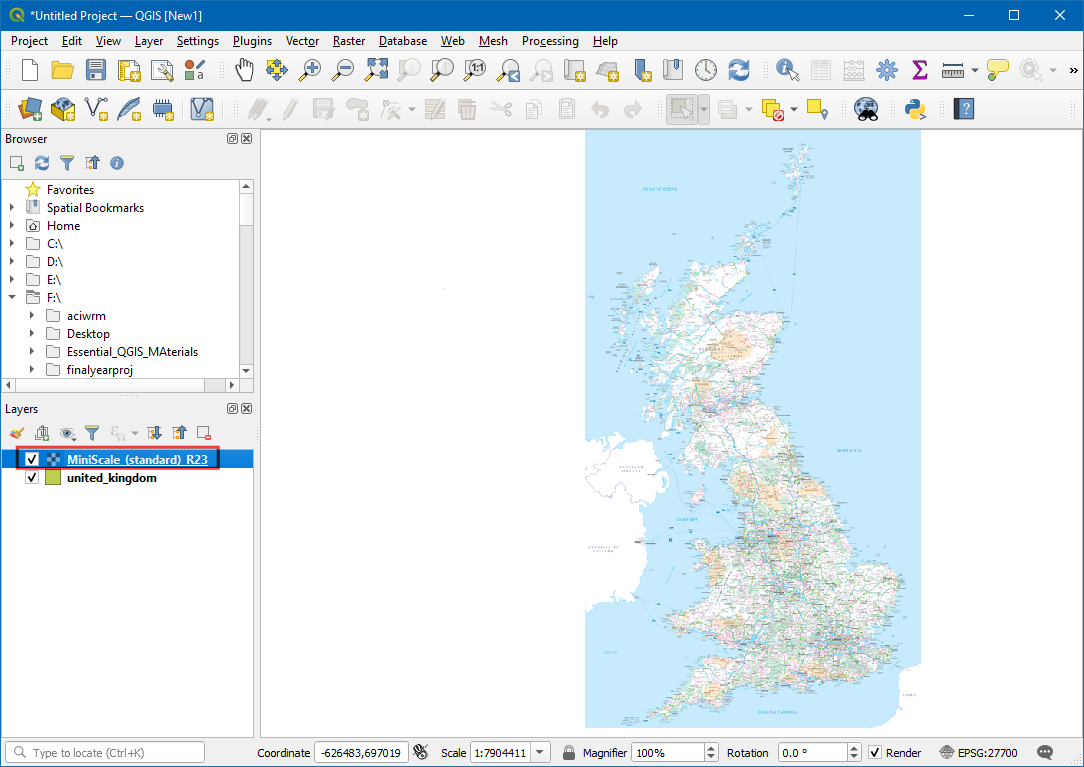
Now let’s add a Raster layer. Go to .
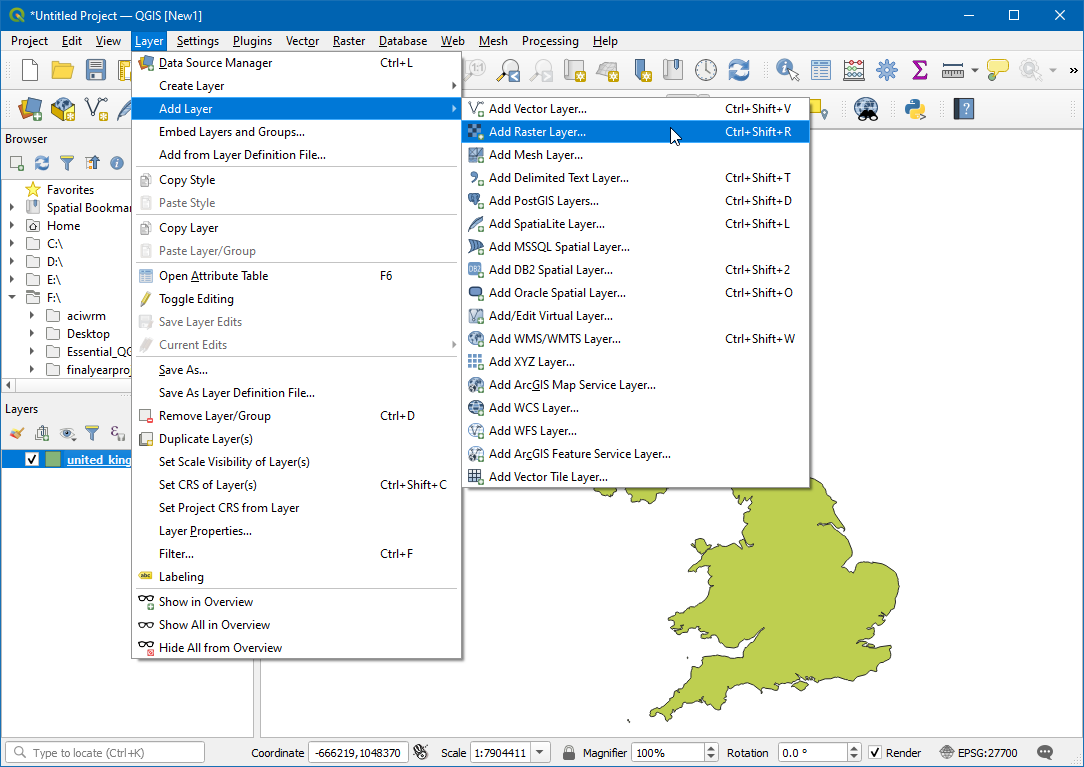
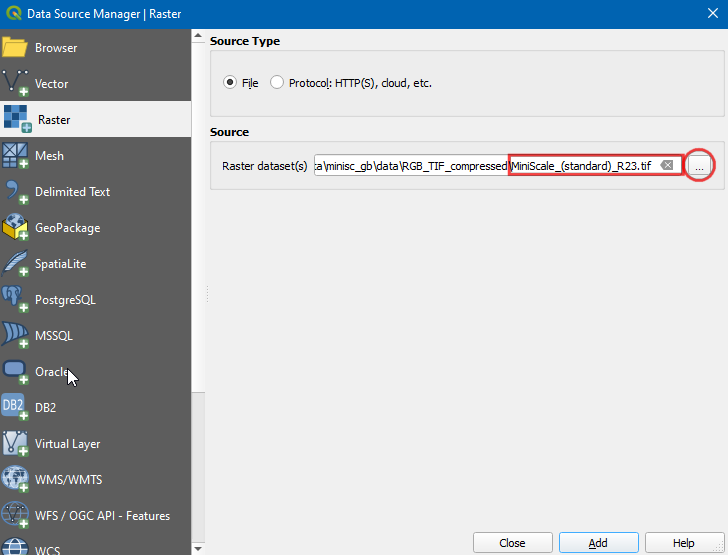
Click on the
...next to Source, select the layerMiniScale_(standard)_R23.tif. Click Add.
Now a new layer
MiniScale_(standard)_R23is added to the canvas.
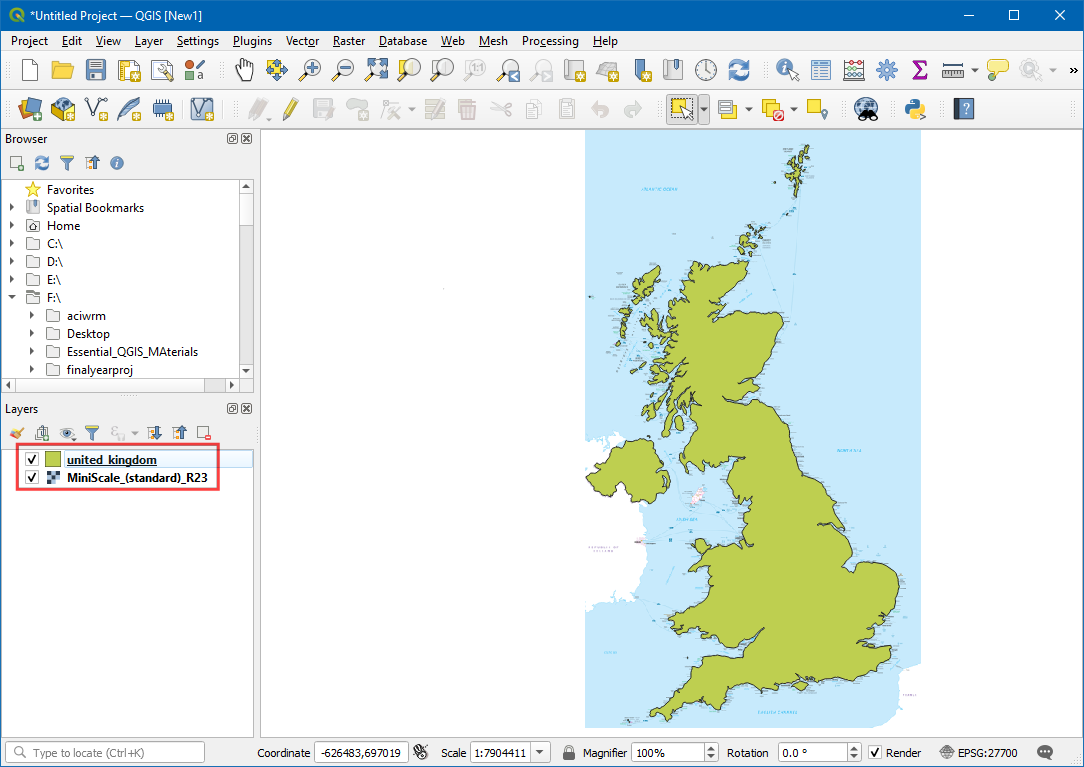
To make both layers visible, switch the order of the layer by dragging the
MiniScale_(standard)_R23to the bottom in the Layers panel.
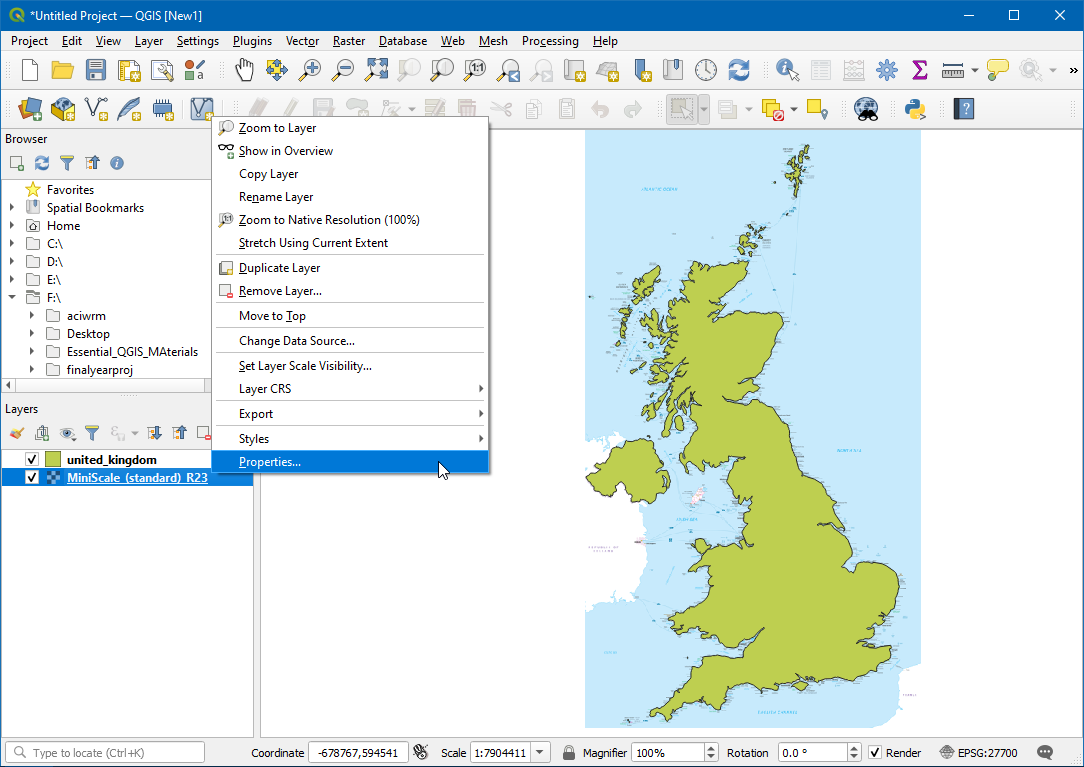
Right-click on the
MiniScale_(standard)_R23layer and click on Properties.
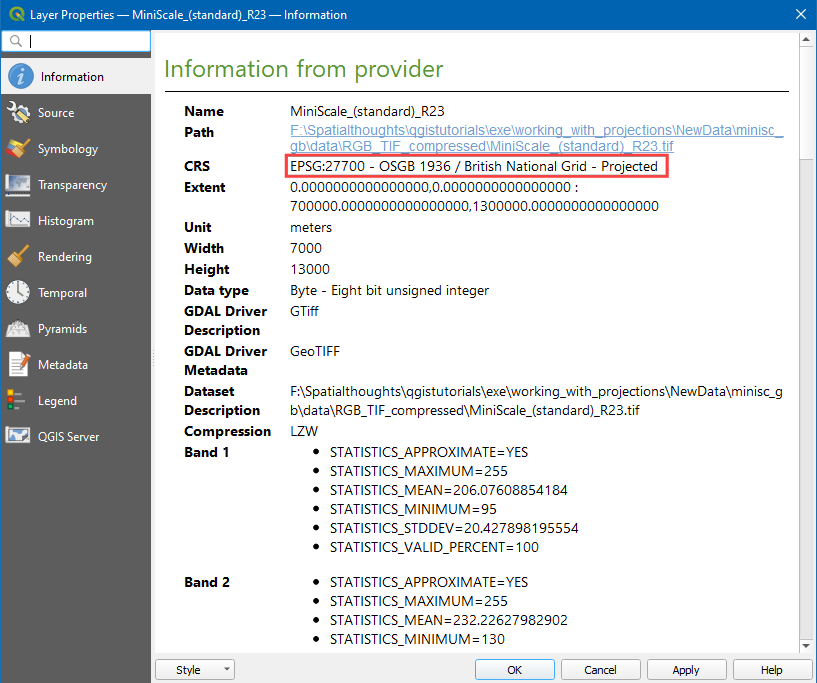
In the Layer Properties, switch to Information, the CRS is
EPSG:27700 - OSBG 1935 / British National Grid - Projected. This confirms that the raster layer’s CRS is the same as the Project CRS.
참고
If you want to re-project a raster layer, you can use algorithm in Processing toolbox.
If you want to give feedback or share your experience with this tutorial, please comment below. (requires GitHub account)